If you’re on the hunt for the perfect blend of sweet, spiced, and crunchy that’s pure comfort in every bite, then this Pear Crisp Recipe is exactly what you need. Imagine juicy, tender pears bathed in warm cinnamon and nutmeg, all crowned by a buttery walnut and oat topping that bakes to golden perfection. This dessert brings together simple ingredients in a way that feels both cozy and a little bit fancy, making it ideal for everything from weeknight treats to special gatherings. Trust me, once you try this Pear Crisp Recipe, it will quickly become a beloved staple in your recipe collection.
Pear Crisp Recipe: Ingredients You’ll Need
Ingredients You’ll Need
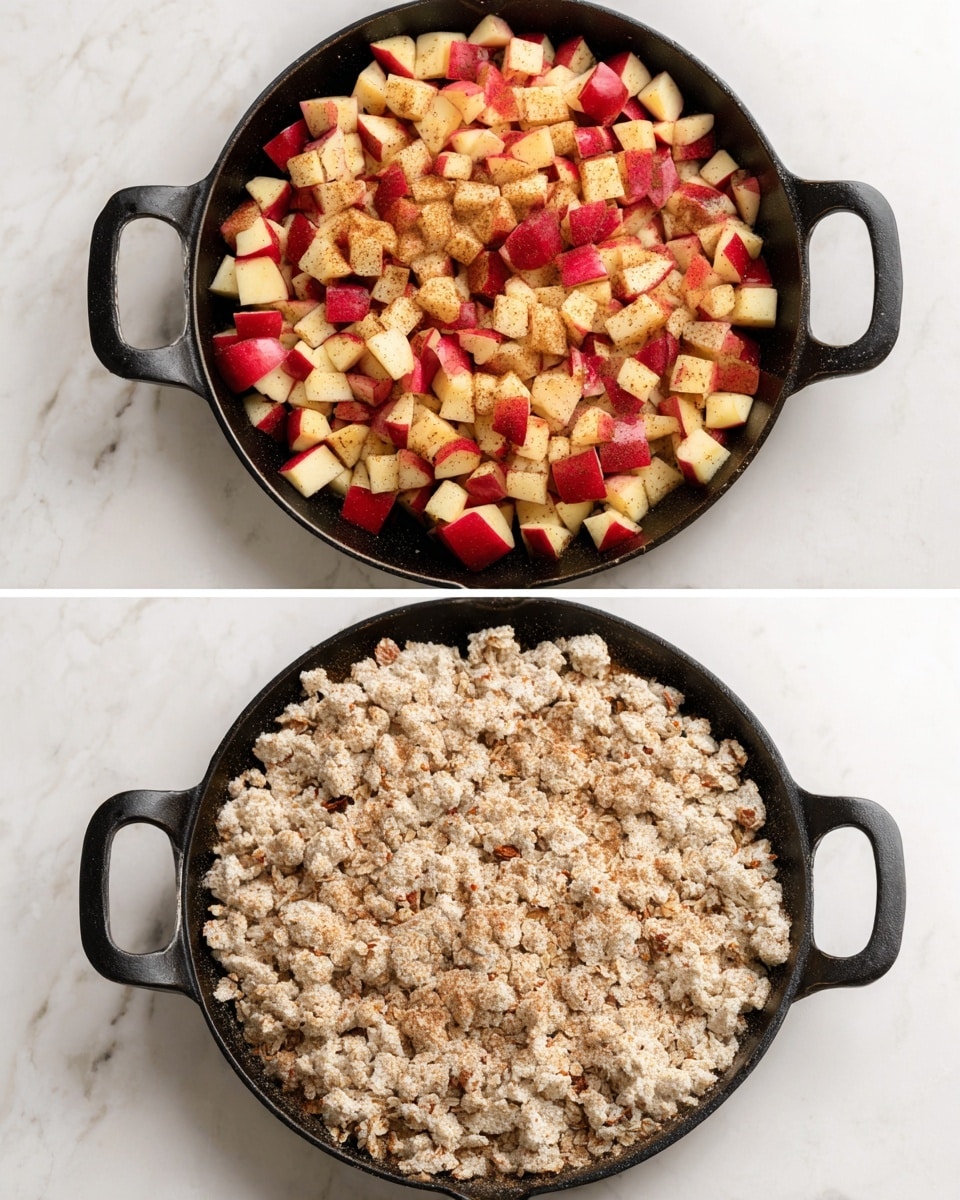
The magic of this Pear Crisp Recipe lies in its straightforward, wholesome ingredients. Each one plays a vital role—ripe pears bring natural sweetness and juiciness, spices add cozy warmth, and the nutty, crumbly topping offers a delightful contrast in texture. Let’s walk through these essentials, so you know exactly what makes this dish shine.
- 5 cups pears (cubed): Choose ripe but firm pears for the best balance of sweetness and texture throughout baking.
- ½ teaspoon ground cinnamon: Adds depth with its warm, aromatic flavor that complements the pears beautifully.
- 2 teaspoons vanilla extract: A subtle booster that enhances the natural fruit flavors and ties the filling together.
- ¼ teaspoon ground nutmeg: Brings a gentle spice note that brightens the dish with its sweet earthiness.
- ¼ cup light brown sugar or coconut sugar: Sweetens the fruit filling while adding a hint of molasses richness.
- ¼ cup water: Keeps the pears juicy and helps dissolve the cornstarch evenly.
- 1 tablespoon cornstarch or arrowroot powder: Thickens the filling so it’s perfectly luscious without being runny.
- ½ cup all-purpose flour or gluten-free flour: Forms the base of the crisp topping, providing structure and tenderness.
- ½ cup oats: Infuses chewy, hearty texture into the topping for a wholesome crunch.
- ⅓ cup light brown sugar or coconut sugar: Sweetens the topping just enough without overpowering the pears.
- ½ teaspoon ground cinnamon: Sprinkled into the topping for extra warmth in every bite.
- 1 cup walnuts (chopped): Adds a toasty, nutty crunch that contrasts beautifully with the tender fruit.
- Pinch of salt: Enhances all the flavors and balances the sweetness.
- ⅓ cup butter (melted): Binds the topping ingredients together and bakes to a irresistibly crispy finish.
You’ll find the full ingredient list, instructions, and print option in the recipe card below.
How to Make Pear Crisp Recipe
Step 1: Prepare Your Baking Dish and Oven
Preheat your oven to 350°F (175°C) and grease an 11-inch oven-safe skillet or a 7×10-inch baking dish. This sets the stage for even baking and a crisp, golden topping without sticking.
Step 2: Mix the Pear Filling
In a large bowl, toss the cubed pears with ground cinnamon, vanilla extract, nutmeg, brown sugar, water, and cornstarch. This careful blend ensures every bite is bursting with spice-laced sweetness and the cornstarch thickens the filling as it bakes, creating that luscious sauce you crave.
Step 3: Prepare the Crisp Topping
Combine the flour, oats, brown sugar, cinnamon, walnuts, and a pinch of salt in another bowl. Stir in the melted butter until the mixture turns crumbly—this will bake into a wonderfully crisp, nutty topping that gives this Pear Crisp Recipe its signature texture.
Step 4: Assemble the Crisp
Pour the pear filling into your prepared baking dish, spreading it out evenly. Then, sprinkle the crisp topping evenly over the pears. This layering sets you up for the perfect contrast of soft filling and crunchy topping.
Step 5: Bake to Perfection
Bake in the center of your preheated oven for 45 to 60 minutes, until the topping is beautifully golden brown and the filling is bubbly. The aroma at this point is pure comfort—trust me, you’ll want to dig in right away.
Step 6: Cool and Serve
Let your pear crisp cool for about 10 minutes before serving to allow the filling to thicken just enough. This wait makes the servings clean and the flavors even more melded together.
Step 7: Enjoy Your Creation
Serve warm on its own or jazz it up with a scoop of creamery-fresh ice cream or a dollop of whipped cream. This Pear Crisp Recipe truly shines with a creamy accompaniment that melts into the tart-sweet pears perfectly.
How to Serve Pear Crisp Recipe
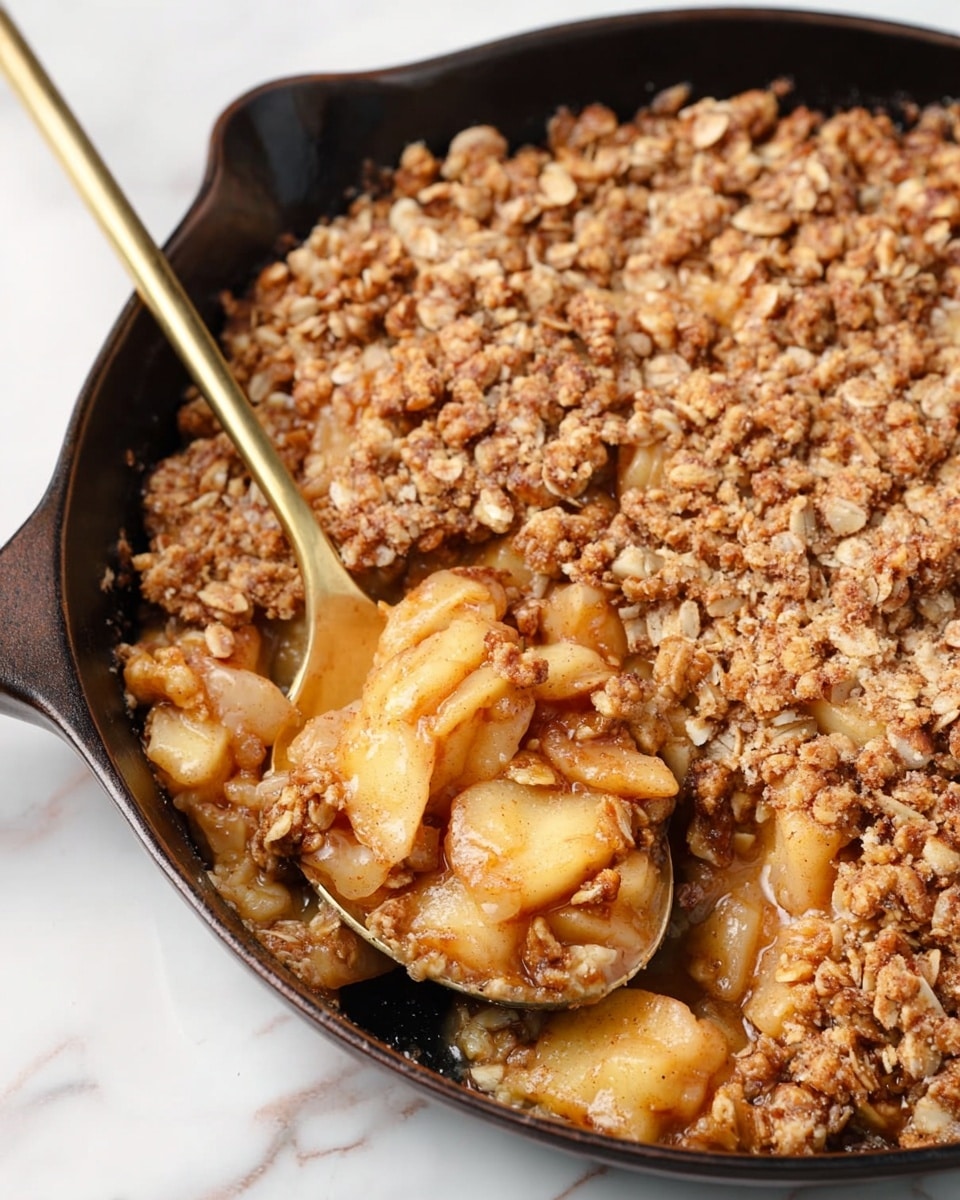
Garnishes
While this pear crisp is delightful on its own, a sprinkle of freshly chopped walnuts or a light dusting of cinnamon on top adds a beautiful finishing touch. You could also drizzle a bit of honey or maple syrup right before serving for extra sweetness and shine.
Side Dishes
This dessert pairs wonderfully with a hot cup of coffee or a fragrant herbal tea, balancing the warm spices of the crisp. For a more indulgent take, a scoop of vanilla or caramel ice cream makes the perfect sidekick, melting right into the fruit and crumbly topping.
Creative Ways to Present
Serve the pear crisp in individual ramekins for charming, personalized portions. Alternatively, layer it with vanilla yogurt or whipped mascarpone in clear glasses for a rustic yet elegant parfait presentation that guests will adore.
Make Ahead and Storage
Storing Leftovers
Leftover pear crisp tastes just as good the next day and can be stored covered in the refrigerator for up to 3 days. Make sure it’s well wrapped to keep the topping from absorbing moisture and becoming soggy.
Freezing
This Pear Crisp Recipe freezes beautifully. After baking and cooling completely, wrap it tightly with plastic wrap and aluminum foil, then freeze for up to 2 months. Thaw overnight in the fridge before reheating for a quick dessert fix later on.
Reheating
To warm up leftovers, place the pear crisp in a 350°F oven for about 15-20 minutes until heated through and topped crisp is re-crisped. Avoid microwaving if you want to keep the crunchy topping intact, but it works well if you’re in a hurry.
FAQs
Can I use canned pears for this Pear Crisp Recipe?
While fresh pears deliver the best texture and flavor, you can use canned pears in a pinch. Be sure to drain them well and reduce the added water in the filling to avoid excess moisture.
Is it possible to make this Pear Crisp Recipe gluten-free?
Absolutely! Simply swap the all-purpose flour with your favorite gluten-free flour blend, and double-check that your oats are certified gluten-free. The crisp topping will still have that wonderful texture you love.
What type of pears works best for this recipe?
Firm and slightly tart pears like Bosc, Anjou, or Bartlett are great choices. They hold their shape well when baked and provide a lovely balance of sweetness and acidity.
Can I substitute walnuts for other nuts?
Yes! Pecans, almonds, or even hazelnuts can be used instead of walnuts to add a different nutty flavor and texture, giving your pear crisp a personalized twist.
How can I make this Pear Crisp Recipe less sweet?
Reduce the amount of brown or coconut sugar slightly in both the filling and topping. Keep in mind that the natural sweetness of ripe pears will still shine through, so you won’t lose that satisfying dessert quality.
Final Thoughts
This Pear Crisp Recipe is a celebration of simple ingredients coming together in the most delicious way imaginable. It’s one of those recipes that feels like a warm hug from the inside out—perfect for sharing with family and friends or indulging in a quiet moment of sweetness yourself. So, go ahead and give it a try; I promise this pear crisp will quickly become your favorite go-to dessert that always hits the spot.
PrintPear Crisp Recipe
This comforting Pear Crisp recipe features tender, cinnamon-spiced pears topped with a crunchy oat and walnut crumble. Baked to golden perfection, it makes an ideal warm dessert that can be enjoyed on its own or with a scoop of ice cream or whipped cream.
- Prep Time: 25 minutes
- Cook Time: 45-60 minutes
- Total Time: 1 hour 10-25 minutes
- Yield: 8 servings
- Category: Dessert
- Method: Baking
- Cuisine: American
Ingredients
Filling
- 5 cups pears, cubed (about 5–6 ripe pears)
- ½ teaspoon ground cinnamon
- 2 teaspoons vanilla extract
- ¼ teaspoon ground nutmeg
- ¼ cup light brown sugar or coconut sugar
- ¼ cup water
- 1 tablespoon cornstarch or arrowroot powder
Topping
- ½ cup all-purpose flour or 1.1 cups gluten-free flour
- ½ cup oats
- ⅓ cup light brown sugar or coconut sugar
- ½ teaspoon ground cinnamon
- 1 cup walnuts, chopped
- Pinch of salt
- ⅓ cup butter, melted
Instructions
- Preheat Oven and Prepare Dish: Preheat your oven to 350°F (175°C). Lightly grease an 11-inch oven-safe skillet or a 7×10-inch baking dish to prevent sticking.
- Mix the Filling: In a large mixing bowl, combine the cubed pears, ground cinnamon, vanilla extract, ground nutmeg, light brown sugar, water, and cornstarch. Toss everything together until the pears are evenly coated with the mixture. Then pour the filling evenly into the prepared baking dish.
- Prepare the Topping: In a separate bowl, mix together the flour, oats, light brown sugar, ground cinnamon, chopped walnuts, and a pinch of salt. Stir in the melted butter until the mixture becomes crumbly and well combined.
- Assemble the Crisp: Evenly sprinkle the crumbly topping over the pear filling, covering the surface completely.
- Bake: Place the dish in the preheated oven and bake for 45 to 60 minutes, or until the topping is golden brown and the pear filling is bubbling around the edges.
- Cool: Once baked, remove from the oven and let the pear crisp cool for about 10 minutes to set before serving.
- Serve: Enjoy the crisp warm on its own or enhance the experience by topping it with ice cream or whipped cream as desired.
Notes
- To make this recipe gluten-free, use gluten-free flour and ensure that the oats are certified gluten-free.
- You can substitute light brown sugar with coconut sugar for a dairy-free and lower glycemic index option.
- For a vegan version, replace butter with a plant-based margarine or coconut oil.
- Ensure pears are ripe but firm to maintain texture after baking.
- This crisp is best enjoyed fresh but can be reheated gently in the oven.

