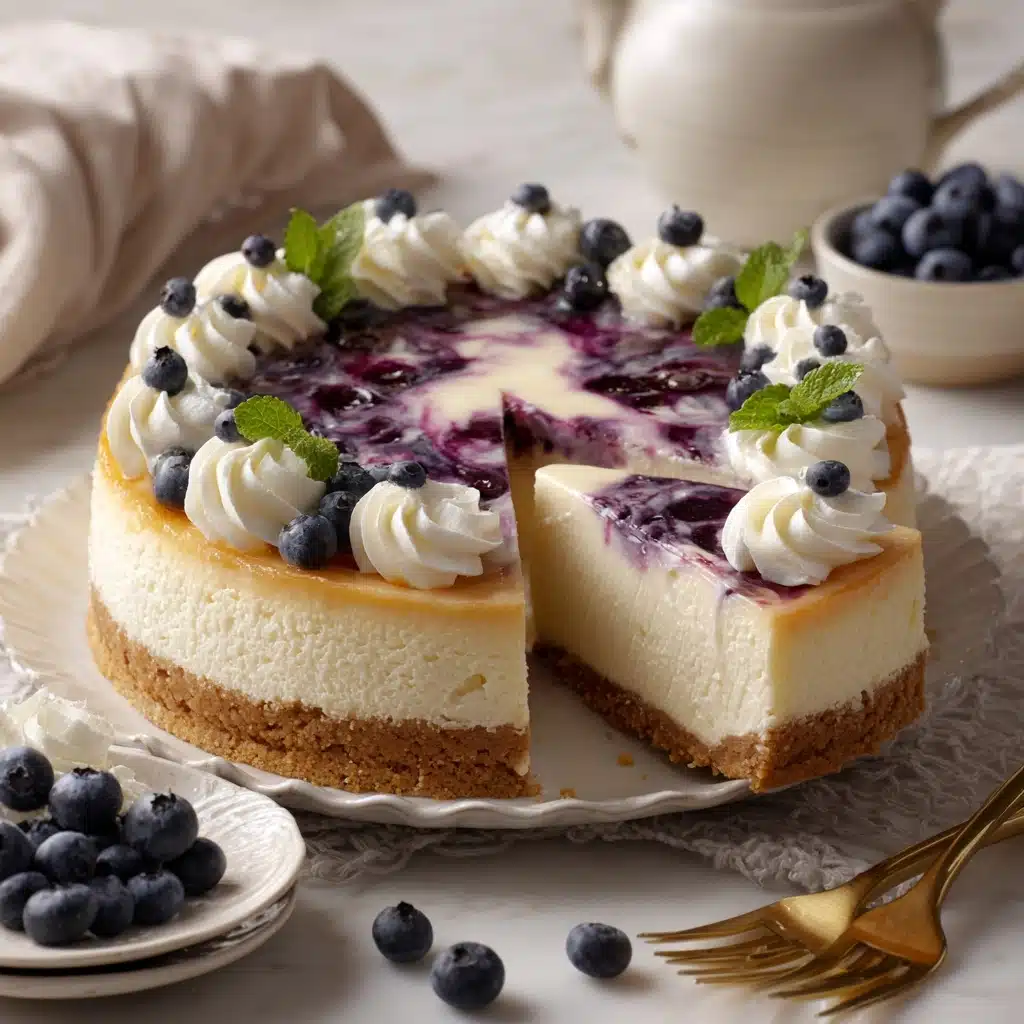
If you’re searching for a show-stopping dessert that’s a breeze to make, look no further than this No Bake Blueberry Pie. With layers of delicate biscuits, luscious blueberry syrup, and a cloud-like mascarpone and cream cheese filling, this sweet treat is a stunner—both on the dessert table and with your taste buds. The bright blueberries and creamy filling are a match made in heaven, and since there’s no oven required, it’s perfect for those days when you want something impressive without all the fuss. Each slice is a dreamy bite that’s sure to steal the spotlight at your next gathering.
Ingredients You’ll Need
This No Bake Blueberry Pie is proof that magic happens with a handful of simple, high-quality ingredients. Each one plays a crucial role, delivering bursts of flavor, luscious texture, and eye-catching color to every single layer.
- Blueberries: Fresh or frozen, they’re the heart of the pie and bring a naturally sweet-tart flavor.
- Granulated Sugar: This sweetens the blueberry syrup, balancing out the fruit’s tang.
- Cream Cheese: Adds a lovely tang and creamy richness to the filling.
- Mascarpone: Gives the cream its smooth, luxurious texture and a delicate, sweet flavor.
- Whipped Cream Stabilizer: It helps the whipped cream hold its structure for gorgeous, neat slices.
- Powdered Sugar: Blends seamlessly into the cream, offering gentle sweetness without grittiness.
- Vanilla Sugar (or Extract): Lends a warm, aromatic note that pairs perfectly with the berries.
- Heavy Cream: Whips into a cloud-like, light filling, making each bite silky and indulgent.
- Maria Biscuits: Mild, sturdy cookies that soften just enough when soaked, creating perfect layers.
- Milk: For dipping the biscuits—just a quick dunk for the ideal texture.
- White Chocolate: Melted into a dreamy ganache topping that’s sweet and creamy.
- Fresh Blueberries & Mint: For garnish—these bring the finishing, photo-worthy touches.
How to Make No Bake Blueberry Pie
Step 1: Make the Blueberry Syrup
Start by placing the blueberries and granulated sugar in a saucepan over medium heat. Bring the mixture to a gentle boil, letting it bubble away for about 7 to 10 minutes. Stir frequently—the goal is to break down the berries and extract all those beautiful juices. Once the mixture is syrupy, strain it through a fine mesh sieve set over a bowl, pressing with a spatula to get every drop of liquid. Discard the leftover pulp; the vivid, clear syrup will be the star in our next steps.
Step 2: Prepare the Blueberry Syrup for Assembly
Pour the strained blueberry syrup into a piping bag, or if you don’t have one, a clean squeeze bottle or small bowl. Set it aside; this tangy, sweet syrup will infuse the cream and decorate the pie beautifully. Trust me, this step makes all the difference!
Step 3: Whip the Creamy Filling
In a large, deep mixing bowl, combine the cream cheese, mascarpone, whipped cream stabilizer, powdered sugar, and vanilla sugar. Beat for a minute on low speed until everything is well blended and smooth—think velvety and lump free. With the mixer running, gradually add the heavy cream and continue mixing until the cream is fluffy and holds stiff peaks. The result? A dreamy, stable filling that slices like a dream.
Step 4: Add Blueberry Flavor to Part of the Cream
Spoon one-third of the cream mixture into another bowl. Gently fold in 75 grams of the blueberry syrup until you get a gorgeous swirl of purple-blue cream. This blueberry-infused portion will add a vivid hit of flavor and color to your layers, making the pie as stunning to look at as it is to eat.
Step 5: Transfer Blueberry Cream for Layering
Scoop the blueberry cream into a separate piping bag (or use a zip-top bag with a snipped corner). This will help you distribute it evenly on the layers and create that beautiful, distinct purple layer inside the pie.
Step 6: Create the Biscuit Base
Quickly dip the Maria biscuits one by one into milk—just a second or two, no more! Line the base of your serving dish or a cake platter with a single, even layer. This forms the foundation of your No Bake Blueberry Pie, providing just enough structure while absorbing fabulous flavor.
Step 7: Layer Cream, Biscuits, and Syrup
Now, pipe the blueberry cream over the biscuit layer and smooth it out. Add a second layer of milk-dipped Maria biscuits, then pipe and smooth half of the plain (white) cream on top. Drizzle a swirl of blueberry syrup over this layer for extra fruitiness. Repeat with a final layer of biscuits and the rest of the white cream, spreading all the way to the edges and covering the sides for a bakery-worthy finish. Pop the pie in the fridge for at least a few hours, but overnight is ideal—it gets even better as it chills!
Step 8: Make the White Chocolate Ganache
Pour 50 ml of heavy cream into a small saucepan and heat until it’s almost boiling. Add the chopped white chocolate, let it sit for one minute, then stir until smooth and glossy. Let this ganache cool—it will thicken slightly and be perfect for pouring over the pie.
Step 9: Add Toppings and Decorate
Pipe a border of cream around the edge of the pie. Spread the cooled white chocolate ganache over the center and drizzle with more blueberry syrup. For an extra-special touch, use a toothpick to swirl the syrup in the ganache, creating a beautiful marbled effect. Cover and chill again to set all the layers together.
Step 10: Slice and Serve
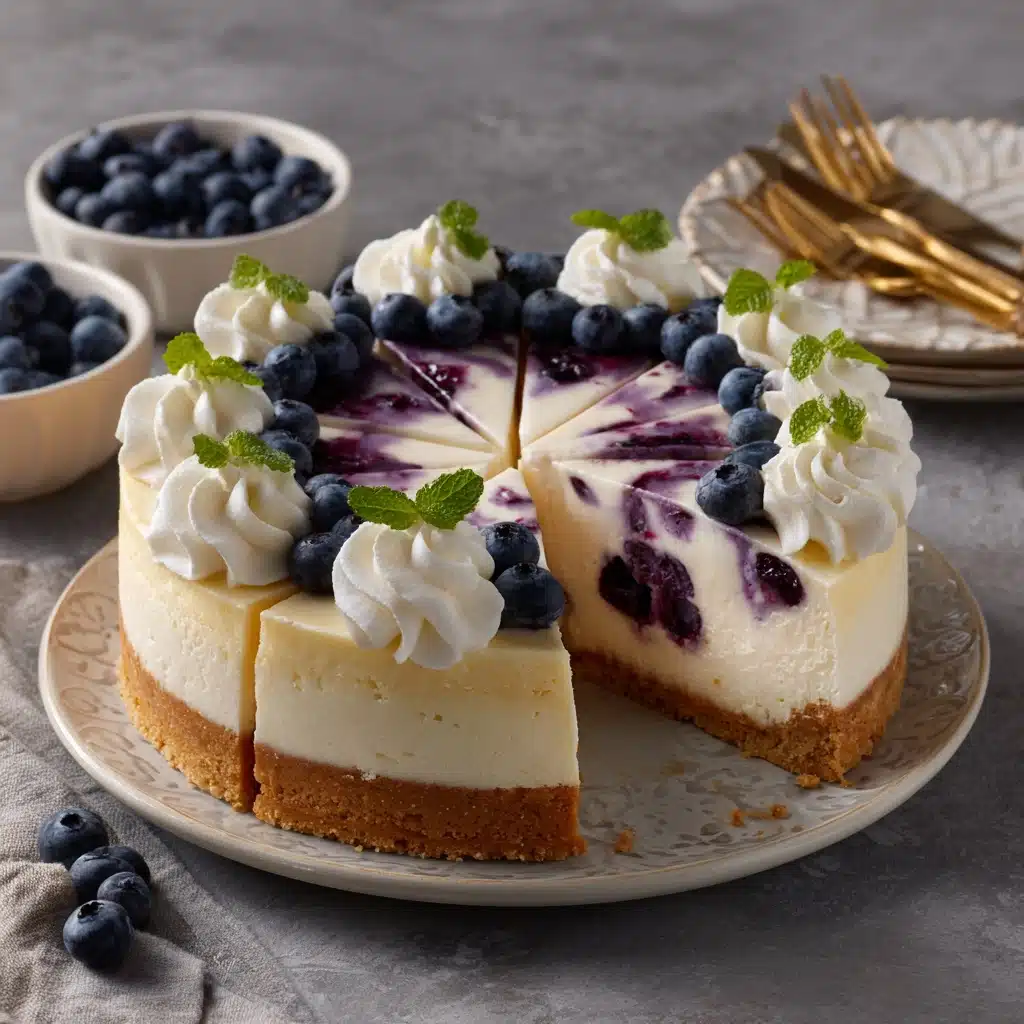
Just before serving, cut the pie into generous slices and crown each one with a handful of fresh blueberries and a few mint leaves. This last-minute garnish adds vibrant color and freshness, making every slice absolutely irresistible.
How to Serve No Bake Blueberry Pie
Garnishes
For the prettiest presentation, decorate your No Bake Blueberry Pie with a generous handful of fresh blueberries and a few sprigs of mint right before serving. The contrast of deep blue and fresh green on the dreamy white and purple layers makes this pie impossible to resist—not to mention Instagram worthy!
Side Dishes
Keep the spotlight on your No Bake Blueberry Pie by offering simple, light accompaniments. A glass of cold milk or a mug of herbal tea perfectly balances the pie’s sweet richness, while a scoop of vanilla ice cream or a handful of extra fruit is always welcome on warm days or at summer parties.
Creative Ways to Present
Looking to impress? Try assembling the pie in individual glasses or jars for a trendy, portable twist that’s perfect for picnics or buffets. Or, get festive by cutting the finished pie into cubes for easy-to-eat dessert bites. You can even add edible flowers or a dusting of powdered sugar for an elegant, homemade touch.
Make Ahead and Storage
Storing Leftovers
To keep your No Bake Blueberry Pie fresh, cover it tightly with plastic wrap or store slices in an airtight container. It will happily chill in the fridge for up to three days, and the flavors actually get even more pronounced after a day of resting.
Freezing
If you’d like to enjoy your No Bake Blueberry Pie later, it freezes better than you might expect! Simply wrap the whole pie or individual slices in two layers of plastic wrap and foil, then freeze for up to one month. Thaw overnight in the refrigerator before serving for the best texture.
Reheating
Since this pie is best served chilled, there’s no need for reheating. In fact, letting it come to room temperature for just a few minutes before serving will soften the layers slightly and make slicing even easier.
FAQs
Can I use frozen blueberries instead of fresh?
Absolutely! Frozen blueberries work just as well as fresh for the syrup—just cook them down from frozen, following the same instructions. They may even yield a slightly more vibrant syrup.
What can I use instead of Maria biscuits?
If you can’t find Maria biscuits, digestive biscuits, graham crackers, or even ladyfingers make fantastic substitutes. Just remember to dip sparingly so they hold their texture.
How long does the No Bake Blueberry Pie need to chill?
A minimum of three to four hours is essential for the layers to set, but for the dreamiest texture and flavor, allow the pie to chill overnight. It’s well worth the wait!
Is whipped cream stabilizer necessary?
Whipped cream stabilizer helps your cream hold its shape longer, especially if you’re making the pie ahead, but if unavailable, you can skip it—just know the filling may be a little softer.
Can I add other fruits to the pie?
Yes, feel free to experiment! Raspberries, blackberries, or even sliced strawberries pair beautifully with blueberries and will give your No Bake Blueberry Pie a mixed berry twist.
Final Thoughts
Sharing this No Bake Blueberry Pie with friends and family always brings smiles and calls for second helpings. One taste of its creamy layering and tangy blueberries and you’ll see why it’s become a household favorite. I hope you’ll whip it up soon, savor every bite, and make it your go-to treat for any occasion!
PrintNo Bake Blueberry Pie Recipe
Looking for an easy, no-bake dessert that’s guaranteed to impress? Say hello to this Blueberry Layer Cake! Packed with creamy layers of mascarpone, sweet blueberry syrup, and soft Maria biscuits, it’s a no-bake wonder that’s as beautiful as it is delicious. The best part? You don’t need fancy tools or hours of prep time—just a few simple ingredients and a bit of patience while it chills in the fridge. Perfect for parties, special occasions, or just treating yourself, this dessert will have everyone asking for seconds (and the recipe!).
- Prep Time: 30 minutes
- Total Time: 30 minutes
- Yield: 8
- Category: Dessert
- Method: No-Bake
- Diet: Vegetarian
Ingredients
BLUEBERRY SYRUP
- 250 g blueberries
- 90 g granulated sugar
CREAM
- 200 g cream cheese
- 250 g mascarpone
- 24 g whipped cream stabilizer
- 50 g powdered sugar
- 8 g vanilla sugar
- 500 ml heavy cream
- 75 g blueberry syrup
FILLING
- maria biscuits
- milk
TOPPING
- 50 ml heavy cream
- 100 g white chocolate
- blueberry syrup
Instructions
- Place the blueberries and granulated sugar in a pan over medium heat. Bring the mixture to a boil for 7–10 minutes, stirring regularly. Place a sieve over a bowl and pour the blueberry mixture through it. Press firmly with a spatula or spoon to extract all the juice, leaving only the pulp behind.
- Pour the blueberry syrup into a piping bag and set aside
- In a deep bowl, combine the cream cheese, mascarpone, whipped cream stabilizer, powdered sugar, and vanilla sugar. Mix for 1 minute until smooth. Gradually add the heavy cream while mixing until firm.
- Separate one-third of the cream into a separate bowl. Add 75 g of blueberry syrup and gently fold it in.
- Transfer this blueberry cream into a piping bag and set aside.
- Briefly dip the Maria biscuits in milk and arrange them in a single layer on a round serving plate.
- Pipe the blueberry cream over the biscuits and spread it evenly. Place a second layer of Maria biscuits on top. Pipe half of the white cream over this layer and spread it evenly. Pipe a swirl of blueberry syrup over it. Repeat this process with another layer of Maria biscuits, followed by the remaining white cream, ensuring the sides are well-covered. Place the cake in the refrigerator to set for at least a few hours, preferably overnight.
- Heat 50 ml of heavy cream until almost boiling. Add the white chocolate and let it sit for 1 minute. Stir the mixture until smooth and let it cool.
- Pipe a layer of cream around the sides of the cake. Spread the white chocolate ganache over the center. Pipe some blueberry syrup over the ganache and use a toothpick to create a decorative pattern. Cover the cake and let it set further in the refrigerator, preferably overnight.
- Cut the cake into slices and decorate with fresh blueberries and mint leaves just before serving.
Notes
- Briefly soak the Maria biscuits in milk. If soaked for too long, they will become too soft and lose their structure.
- Letting the cake sit in the refrigerator overnight allows the flavors to meld better and makes the biscuits delightfully soft.
- Decorate just before serving. Fresh blueberries and mint look much better when added at the last moment.
- Replace vanilla sugar with vanilla extract if preferred.


