If you’re looking to delight friends and family with a festive treat that’s both fun and approachable, this Easy Decorated Halloween Cupcakes Recipe is your go-to for seasonal sweet magic. Picture perfectly piped pumpkin faces, quirky monsters with candy eyes, and spidery webs crafted from rich buttercream frosting—each cupcake a mini masterpiece brimming with charm. Whether you’re a baking newbie or a seasoned pro, these cupcakes offer a joyful decorating experience that captures the spirit of Halloween without any fuss. Ready your piping bags and let’s get those spooky, adorable cupcakes dancing off your kitchen counter!
Ingredients You’ll Need
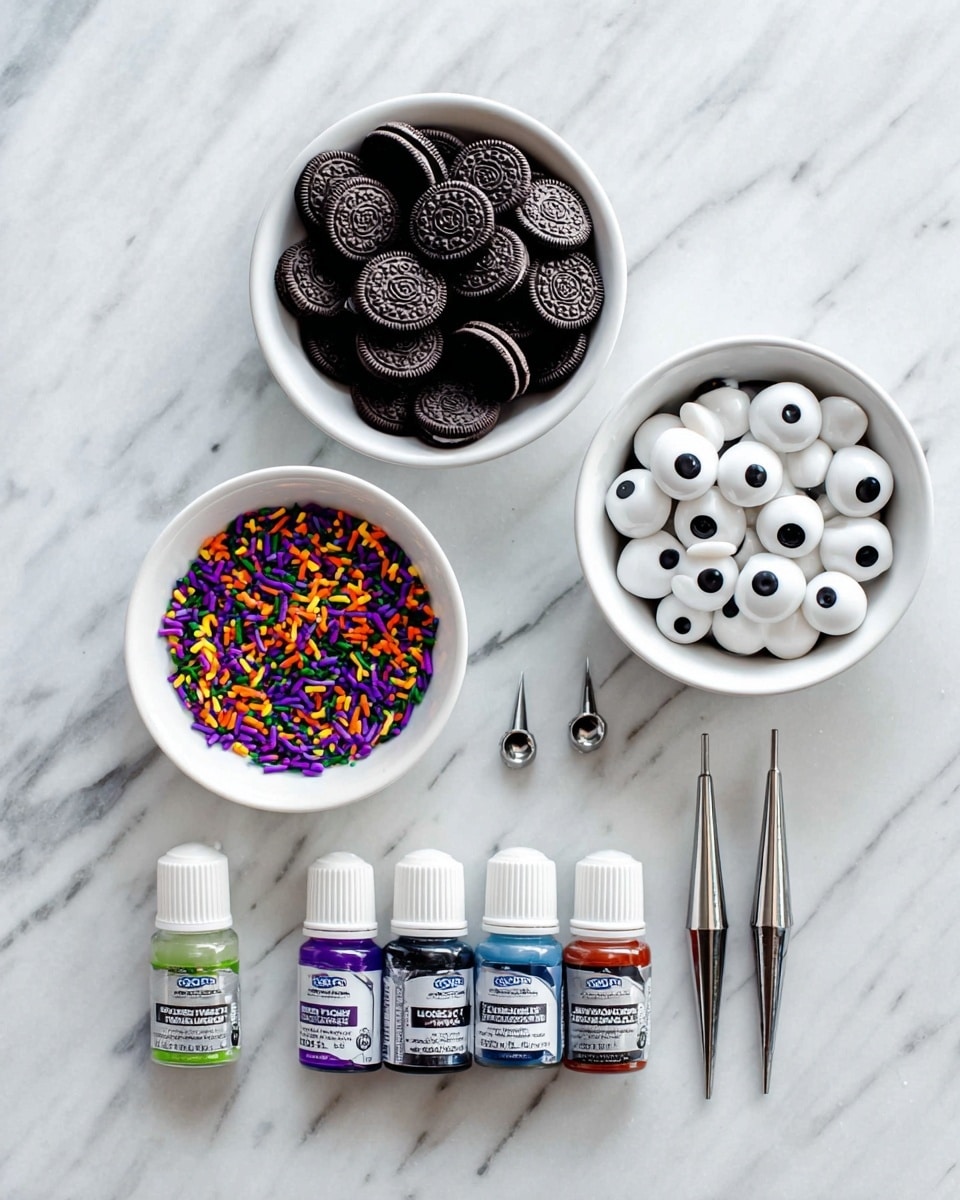
To whip up these irresistibly spooky cupcakes, all you need are simple and essential ingredients that come together to create a perfect balance of flavor, texture, and festive colors. Each component plays its role—from the moist pumpkin cupcake base to the silky, smooth vanilla buttercream that holds all the fun decorations in place.
- 12 pumpkin cupcakes or your favorite cupcake recipe: The base of your creation, moist and flavorful, perfect for holding all the frosting fun.
- 1 ½ cups (340g) unsalted butter, softened: Creates a creamy, luscious buttercream that’s easy to pipe.
- 6 cups (720g) confectioners’ sugar: Sweetens and thickens the frosting to the ideal consistency.
- 6 Tablespoons (60ml) heavy cream, half-and-half, or whole milk: Adds silkiness; heavy cream gives the richest texture.
- 2 teaspoons pure vanilla extract: Provides warmth and depth of flavor to the frosting.
- Salt, to taste: Balances sweetness and enhances overall flavor.
- Gel food coloring (Leaf Green, Fuchsia + Violet, Orange, Super Black): Brings your Halloween designs to life with vivid colors that don’t thin your frosting.
- Piping bags, couplers, and tips: Essential tools for creating beautiful swirls, stars, and lines.
- Small and large candy eyeballs: Characterful details that add a playful monster vibe.
- Oreo Mini cookies: Perfect for crafting spooky spider bodies.
- Sprinkles (optional): Add some extra whimsy and sparkle.
You’ll find the full ingredient list, instructions, and print option in the recipe card below.
How to Make Easy Decorated Halloween Cupcakes Recipe
Step 1: Prepare the Vanilla Buttercream
Start with the star of your decoration—the vanilla buttercream. Using a mixer fitted with a paddle attachment, beat the softened butter until creamy and smooth, about two minutes. Slowly add 5 and ½ cups of sifted confectioners’ sugar alongside heavy cream and vanilla extract, combining on low speed first then ramping to medium-high until fluffy. If the frosting tastes overly sweet, a pinch of salt will balance it perfectly. The secret to an ultra-smooth finish is gently “mashing” the frosting with a spatula to remove air bubbles, giving your cupcakes a professional touch.
Step 2: Color Your Frosting
Divide your buttercream into separate bowls to tint each batch with gel food coloring. For the monsters, use Leaf Green for a lively green and mix Fuchsia with Violet to achieve a mystical purple shade. Jack-o’-lantern shades call for vibrant orange and leafy green, while the spider design keeps it elegantly simple with white and super black. Don’t be shy to tweak the shades a bit with tiny drops of black coloring to soften the vibrancy—the colors deepen as they settle.
Step 3: Decorate the Monster Cupcakes
Green monsters get a swirled spiral of green frosting piped with a small open star tip, crowned with a large candy eyeball. The purple monsters look cute and textured with piped star shapes crowded atop, each adorned with smaller eyeballs and optional sprinkles to amp up the whimsy.
Step 4: Craft Jack-o’-Lantern Masterpieces
Pipe orange frosting in rounded vertical stripes to mimic pumpkin ridges, edging each line from one side to the other with a large petal tip. Add a green frosting stem at the top and black details for the eyes, nose, and quirky mouth with a small round piping tip. Customize your pumpkin’s personality—go goofy, spooky, or somewhere in between!
Step 5: Build the Spider Cupcakes
Spread a smooth layer of white frosting on each cupcake with a spatula, then pipe six radiating black lines to form a web, connecting them with delicate curved lines. Half an Oreo Mini serves as the spider’s body, complete with black frosting eyes and tiny candy eyeballs for that extra creepy-cute effect. Finish by piping eight thin legs out from the Oreo, completing your eight-legged friend.
How to Serve Easy Decorated Halloween Cupcakes Recipe

Garnishes
To elevate the festive vibe, scatter some Halloween-themed sprinkles or edible glitter over cupcakes just before serving. Fresh mint leaves or tiny pumpkin candy pieces add an unexpected pop of freshness and color, making your cupcakes feel extra special at any party table.
Side Dishes
Serve these cupcakes alongside warm autumnal drinks like spiced apple cider or rich hot chocolate for a cozy, seasonal pairing. For a savory balance, consider a platter of roasted nuts or pumpkin seeds seasoned with warming spices to complement the sweet treats effortlessly.
Creative Ways to Present
Arrange your cupcakes on a tiered cake stand decorated with faux cobwebs and mini pumpkins to create an enchanting Halloween display. Add themed cupcake liners and wrap the stand in autumn leaves to transform your dessert table into a spooky celebration spotlight. Individual cupcake boxes with clear lids also make perfect favors to share the seasonal joy!
Make Ahead and Storage
Storing Leftovers
Your decorated cupcakes can be stored uncovered at room temperature for a few hours, perfect if you’re prepping for a party. Covered and refrigerated in an airtight container, they last up to five days but are best enjoyed fresh to keep the candy eyes looking their best.
Freezing
If you want to prepare cupcakes ahead of time, freeze un-decorated cupcakes wrapped tightly in plastic wrap and foil for up to three months. Thaw thoroughly before decorating to avoid moisture ruining your beautiful buttercream designs.
Reheating
Since these cupcakes are best served cool or at room temperature, reheating isn’t recommended for preserving the look and texture of the frosting. If you need to warm them slightly, do so very briefly with the frosting side up to avoid melting your handiwork.
FAQs
Can I use a different cupcake flavor for this Easy Decorated Halloween Cupcakes Recipe?
Absolutely! While pumpkin cupcakes are perfect for the season, feel free to use vanilla, chocolate, or even red velvet cupcakes as your base. The decorating techniques apply beautifully to all flavors.
What if I don’t have gel food coloring?
You can use liquid food coloring, but gel is preferred as it won’t thin your frosting. If using liquid, add it sparingly to avoid losing that perfect piping consistency.
How do I prevent the candy eyes from sliding off?
Place the candy eyes gently onto freshly piped frosting and press down just enough for them to stick without melting the icing. If the frosting is too soft, chill it slightly before adding decorations.
Can I make the buttercream ahead of time?
Yes, you can make the buttercream a day ahead, cover tightly and refrigerate. Before piping, bring it to room temperature and re-whip to bring back its creamy texture.
What is the best way to transport decorated Halloween cupcakes?
Use a cupcake carrier or a sturdy box with cupcake inserts to keep cupcakes upright and protected. Keep them cool and avoid stacking to preserve your detailed decorations.
Final Thoughts
There’s something truly joyful about decorating cupcakes with a splash of creativity and a pinch of Halloween spirit, and this Easy Decorated Halloween Cupcakes Recipe captures that magic perfectly. Whether you’re baking for a party, school event, or just a cozy night in, these cupcakes bring smiles, sweet flavors, and memorable fun to every bite. So grab your piping bags, gather your favorite colors, and dive into the festive decorating adventure—you won’t regret it!
PrintEasy Decorated Halloween Cupcakes Recipe
Create festive and fun Halloween cupcakes with these easy decorating ideas including monster, jack-o’-lantern, and spider designs. Start with your favorite cupcake recipe and use homemade vanilla buttercream tinted with vibrant gel food colors for spooky decorations perfect for Halloween parties or celebrations.
- Prep Time: 45 minutes
- Cook Time: 0 minutes
- Total Time: 45 minutes
- Yield: 12 cupcakes
- Category: Dessert
- Method: No-Cook
- Cuisine: American
Ingredients
Cupcakes
- 12 pumpkin cupcakes or your favorite cupcake recipe
Vanilla Buttercream
- 1 and 1/2 cups (340g) unsalted butter, softened to room temperature
- 6 cups (720g) confectioners’ sugar
- 6 Tablespoons (60ml) heavy cream, half-and-half, or whole milk, at room temperature
- 2 teaspoons pure vanilla extract
- Salt, to taste
Monster Cupcakes
- Gel food coloring: Leaf Green, Fuchsia + Violet, Super Black
- 2 piping bags
- 2 couplers
- Piping tip: small open star tip such as Wilton #21
- Small candy eyeballs
- Large candy eyeballs
- Optional: sprinkles
Jack-o’-Lantern Cupcakes
- Gel food coloring: Orange, Leaf Green, Super Black
- 3 piping bags
- Piping tips: Wilton #125, Wilton #21, small round tip such as Wilton #4
Spider Cupcakes
- Gel food coloring: Super Black
- 1 piping bag
- Piping tip: small round tip such as Wilton #4
- Oreo Mini cookies
- Mini candy eyeballs
Instructions
- Make the vanilla buttercream: Beat the softened butter on medium speed with a handheld or stand mixer until creamy, about 2 minutes. Add 5 and 1/2 cups (660g) confectioners’ sugar, heavy cream, and vanilla extract. Beat on low speed for 30 seconds, then increase to medium-high and beat for 2 minutes. Taste and add a pinch of salt (about 1/8 teaspoon) if frosting is too sweet. To remove air bubbles, stir by hand with a silicone spatula or wooden spoon for 1–2 minutes until bubbles pop.
- Adjust frosting consistency: If frosting is too thin, add up to 1/2 cup more confectioners’ sugar. If too thick, add heavy cream 1 tablespoon at a time, beating and tasting until desired consistency is achieved.
- Tint the frosting: Divide frosting into bowls for each color needed. Use gel food coloring drops to tint each bowl to your desired shades—green, purple (made from fuchsia + violet), orange, black, and leave one bowl white for the spider cupcakes. Optionally, add a tiny dot of black gel to tone down colors. Color will deepen as frosting sets.
- Decorate Green Monster Cupcakes: Fit a piping bag with a small open star tip (Wilton #21) and coupler. Fill with green frosting. Pipe a spiral starting from the outside working inward on the cupcake. Place one large candy eyeball in the center and gently press it into the frosting.
- Decorate Purple Monster Cupcakes: Using the same tip and coupler setup as green monsters, fill the bag with purple frosting. Pipe stars all over the cupcake surface to cover it. Press small candy eyeballs into the frosting and add sprinkles if desired.
- Decorate Jack-o’-Lantern Cupcakes: Fill one piping bag with orange frosting fitted with a large petal tip (Wilton #125), another with green frosting and a small open star tip (Wilton #21), and a third with black frosting and a small round tip (Wilton #4). Pipe rounded vertical lines alternating sides with orange frosting to create pumpkin ridges. Use green frosting to pipe the stem on top. Use black frosting to pipe eyes, nose, and mouth for the jack-o’-lantern face.
- Decorate Spider Cupcakes: Spread white frosting evenly on the cupcake with a small offset spatula or knife. Fit a piping bag with black frosting and a small round tip (Wilton #4). Pipe three crisscross lines to form six triangular sections, connect with curved lines to make webbing. Place half a Mini Oreo cookie onto the web for the spider body, pipe two small black dots for eyes and place mini candy eyeballs on top. Pipe four legs on each side of the Oreo to complete the spider.
- Storage: Store decorated cupcakes uncovered at room temperature for a few hours before serving. Leftover cupcakes can be covered and refrigerated for up to 5 days. Use a cupcake carrier for transport and storage.
Notes
- Make Ahead Instructions: These cupcakes are best served the day they are decorated, as candy eyes can become runny if stored too long. Cupcakes can be baked 1 day ahead, covered at room temperature, but decorate just before serving.
- Special Tools: Electric mixer (handheld or stand), silicone spatula or wooden spoon, reusable or disposable piping bags, cupcake carrier, various piping tips, gel food coloring, candy decorations (eyeballs, Oreos).
- Confectioners’ Sugar: For best results, sift the confectioners’ sugar once or twice if it is lumpy before measuring.
- Heavy Cream: Use heavy cream for creamier buttercream. Half-and-half or whole milk can be substituted but may produce less creamy frosting. Ensure dairy is at room temperature to avoid grainy or separated frosting.
- Vanilla Buttercream Yield: The recipe makes about 4+ cups of frosting, sufficient for decorating 12 cupcakes with multiple designs.

