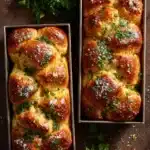
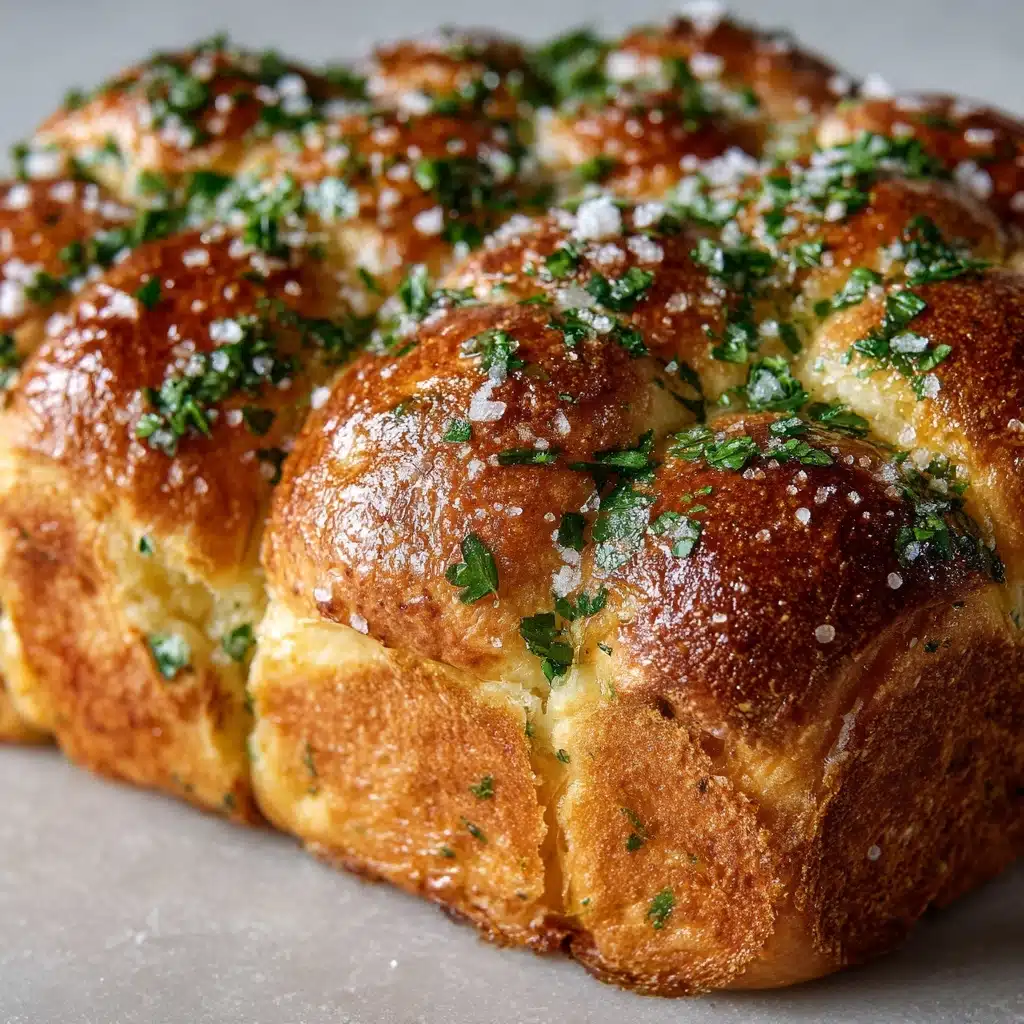
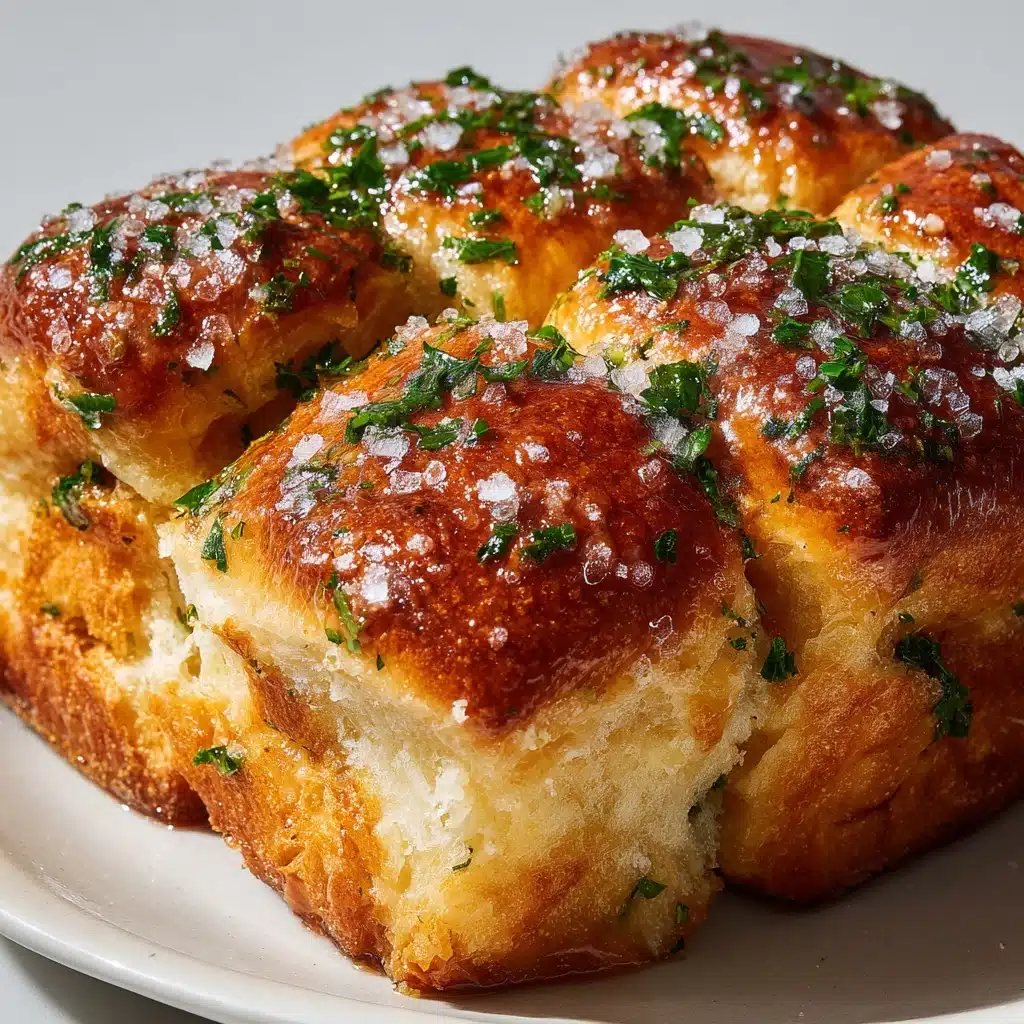
Get ready to wow your senses and your guests with the ultimate Pull Apart Garlic Bread! Imagine a gorgeous golden loaf, teasing with the irresistible aroma of garlic and butter, that you simply tear into warm, fluffy bites—no knife required. This homemade recipe makes bakery-style Pull Apart Garlic Bread from scratch and is so delightfully soft and buttery that you’ll honestly wonder why you ever settled for anything from the store. It’s fun to prepare, dazzling on the table, and a total crowd-pleaser—plus, it’s easier than you think!
Ingredients You’ll Need
You’ll be amazed at how just a handful of basic kitchen staples can come together to create such epic flavor. Each ingredient here isn’t just for show—they all play a crucial part in making this Pull Apart Garlic Bread as pillowy, fragrant, and completely addictive as it is.
- Warm water: Activates the yeast and helps the dough become perfectly tender and chewy.
- White sugar: Gives a subtle sweetness and boosts the yeast for fluffy rise.
- Active dry yeast: Essential for that cloud-like loaf and rich, bready goodness.
- Unsalted butter (softened & melted): Adds irresistible flavor and a meltingly soft crumb, plus makes the top gorgeously buttery.
- Milk: Makes the dough extra tender and slightly creamy for a richer taste.
- Salt: Balances all the flavors so the garlicky, buttery aroma truly shines.
- Bread flour: Key for creating that stretchy, pull-apart texture—don’t swap for all-purpose!
- Fresh parsley leaves: For a hit of fresh, herby color and flavor to finish.
- Garlic (finely minced): The star player, giving every bite its unmistakable garlicky punch.
- Grated Parmesan cheese (optional): Adds a touch of salty nuttiness (highly recommended if you love cheese!).
- Pinch of salt (for topping): Makes the top even more crave-worthy.
How to Make Pull Apart Garlic Bread
Step 1: Activate the Yeast
Pour your warm water into the bowl of a stand mixer fitted with the dough hook. Sprinkle the sugar and yeast right in, and let it hang out for 5 to 10 minutes until it’s foamy and smells yeasty. This little bubbling show lets you know the yeast is awake and ready to make your Pull Apart Garlic Bread pillowy-soft!
Step 2: Mix the Dough
Next, stir in the softened butter, milk, and salt, then gradually add the bread flour. Let your mixer knead away for about 7 to 10 minutes—the dough should get smooth and elastic, clearing the sides of the bowl but hugging the bottom. If it seems a bit too dense, splash in a tablespoon or two more water. This will help keep your bread light as a cloud.
Step 3: Portion and Shape the Dough
Once your dough is beautifully soft and supple, divide it into two equal portions. Cut each portion into even, small dough balls—think the size of ping pong balls or smaller if you want lots of pull-apart pieces. Each piece is a soon-to-be garlicky delight waiting for its buttery bath!
Step 4: Make the Garlicky Butter
In a small bowl, mix together the melted butter, a pinch of salt, freshly chopped parsley, finely minced garlic, and Parmesan cheese if you’re using it. This mixture is what makes your Pull Apart Garlic Bread sing with flavor in every nook and cranny.
Step 5: Dip and Arrange
This part is pure fun! Dip each dough ball generously into the butter mixture so every bit soaks up that rich flavor. Arrange the coated dough balls snugly in two mini loaf pans or one regular-sized loaf pan. Leave enough space for them to puff up—they’ll double in size as they rise!
Step 6: Rise and Bake
Cover your pans with a kitchen towel or plastic wrap and let them rise for about an hour. When the dough is fully doubled and super fluffy, slide the pans into a preheated 350°F (176°C) oven. Bake for 30 minutes, or until the tops are irresistibly golden brown and your kitchen smells like a cozy Italian bakery.
Step 7: Butter Brush and Serve
Don’t forget the grand finale: As soon as your Pull Apart Garlic Bread emerges from the oven, baste the tops with the leftover butter mixture for maximum glossy flavor. Let the loaves cool slightly, then invite people to pull apart and dive in!
How to Serve Pull Apart Garlic Bread
Garnishes
For a beautiful touch, scatter extra chopped parsley or a sprinkle of grated Parmesan over your freshly baked Pull Apart Garlic Bread. This adds lovely color and just a little more flavor. If you’re feeling bold, a dusting of crushed red pepper works wonders for those who like a gentle kick.
Side Dishes
This bread pairs like a dream with hearty pasta dishes, soups, or saucy stews. It’s perfect for mopping up every last bit of marinara or creamy chowder. Serve alongside a big salad for a balanced meal, or make it the star with a platter of antipasti and cheeses.
Creative Ways to Present
For parties, pull the loaves apart into individual rolls and stack them on a cutting board, or bake in a deep round dish for a dramatic, shareable centerpiece. Try serving with small bowls of marinara, pesto, or whipped garlic butter for dunking—guaranteed to delight a crowd!
Make Ahead and Storage
Storing Leftovers
If you find yourself with leftover Pull Apart Garlic Bread (which, honestly, is rare!), wrap it in foil or pop it in an airtight container. It keeps well at room temperature for up to two days, or in the refrigerator for up to four days. Just make sure it’s tightly sealed so it doesn’t dry out.
Freezing
Pull Apart Garlic Bread freezes beautifully. Cool the bread completely, wrap it tightly in plastic and foil, and stash in the freezer for up to two months. You can freeze whole loaves or individual pieces for grab-and-go garlic bread whenever you crave it.
Reheating
To reheat, remove any plastic wrap and cover the bread in foil. Warm in a 350°F (176°C) oven for 10 to 15 minutes until heated through. For single pieces, a quick zap in the microwave does the trick, but the oven keeps the edges crisp and the center fluffy.
FAQs
Can I make Pull Apart Garlic Bread without a stand mixer?
Absolutely! You can mix and knead the dough by hand—it just takes a bit more muscle but yields the same delicious results. Knead until the dough is smooth, elastic, and slightly tacky.
What kind of loaf pan should I use?
Standard loaf pans or two mini loaf pans both work perfectly. Just make sure the dough balls are snuggled in without too much space; they’ll expand and bake together into that classic pull-apart style.
Can I use all-purpose flour instead of bread flour?
Bread flour is best for the stretchy, chewy texture, but if you can’t find it, all-purpose flour is an acceptable substitute. The bread will still be tasty, though perhaps a bit less chewy.
How do I know when my bread is done baking?
Your Pull Apart Garlic Bread should be deeply golden on top and sound hollow when tapped. If you have a thermometer, the internal temperature should read around 190°F to 200°F.
Can I add more cheese or other herbs?
Absolutely! Sprinkle in shredded mozzarella, cheddar, or extra Parmesan between the dough balls, or mix in your favorite herbs like rosemary or basil for a customized loaf that reflects your favorite flavors.
Final Thoughts
Pull Apart Garlic Bread is comfort food at its finest—cheesy, garlicky, and oh-so-soft. It’s the kind of bread people remember, and the sort of recipe that just begs to be made again and again. I can’t wait for you to take that first tear and taste—your kitchen will never be the same!
PrintPull Apart Garlic Bread Recipe
This easy homemade Pull Apart Garlic Bread is seriously the softest, fluffiest, most foolproof garlic bread ever. Loaded with buttery garlic flavor in every bite and no slicing needed. Just tear and eat. Once you try it, you’ll never go back to store-bought.
- Prep Time: 1 hour 20 minutes
- Cook Time: 30 minutes
- Total Time: 1 hour 50 minutes
- Yield: 2 loaves
- Category: Bread
- Method: Baking
- Cuisine: American
- Diet: Vegetarian
Ingredients
Dough:
- 1/2 cup warm water
- 1 tablespoon white sugar
- 1 teaspoon active dry yeast
- 1 tablespoon unsalted butter, softened
- 1/2 cup milk
- 1 teaspoon salt
- 2 1/2 cups bread flour
Topping:
- 4 tablespoons unsalted butter, melted
- 1 pinch salt
- some fresh parsley leaves, finely chopped
- 3 cloves garlic, finely minced
- 1 teaspoon grated Parmesan cheese, optional
Instructions
- Dough Preparation: Add warm water to the bowl of a stand mixer fitted with a dough hook. Sprinkle sugar and yeast into the water and let it stand for 5-10 minutes until foamy. Mix in the butter, milk, and salt, then gradually stir in the flour. Knead for 7-10 minutes until the dough is elastic. Divide into 2 portions.
- Topping: Combine melted butter, salt, parsley, garlic, and Parmesan. Cut dough into pieces, dip in butter mixture, and place in loaf pans. Let rise for 1 hour.
- Baking: Bake at 350°F (176°C) for 30 minutes until golden brown. Baste with remaining butter mixture.
Notes
- Source: Gather for Bread
- Add 1 to 2 tablespoons of water if the dough is too tough.
- Dough should stick to the bottom of the bowl but clear the sides.
- You can divide the dough balls into as many pieces as desired for the loaf pan.
Nutrition
- Serving Size: 1 loaf
- Calories: 897 kcal
- Sugar: 9g
- Sodium: 1260mg
- Fat: 34g
- Saturated Fat: 20g
- Unsaturated Fat: 10g
- Trans Fat: 1g
- Carbohydrates: 125g
- Fiber: 4g
- Protein: 23g
- Cholesterol: 85mg

