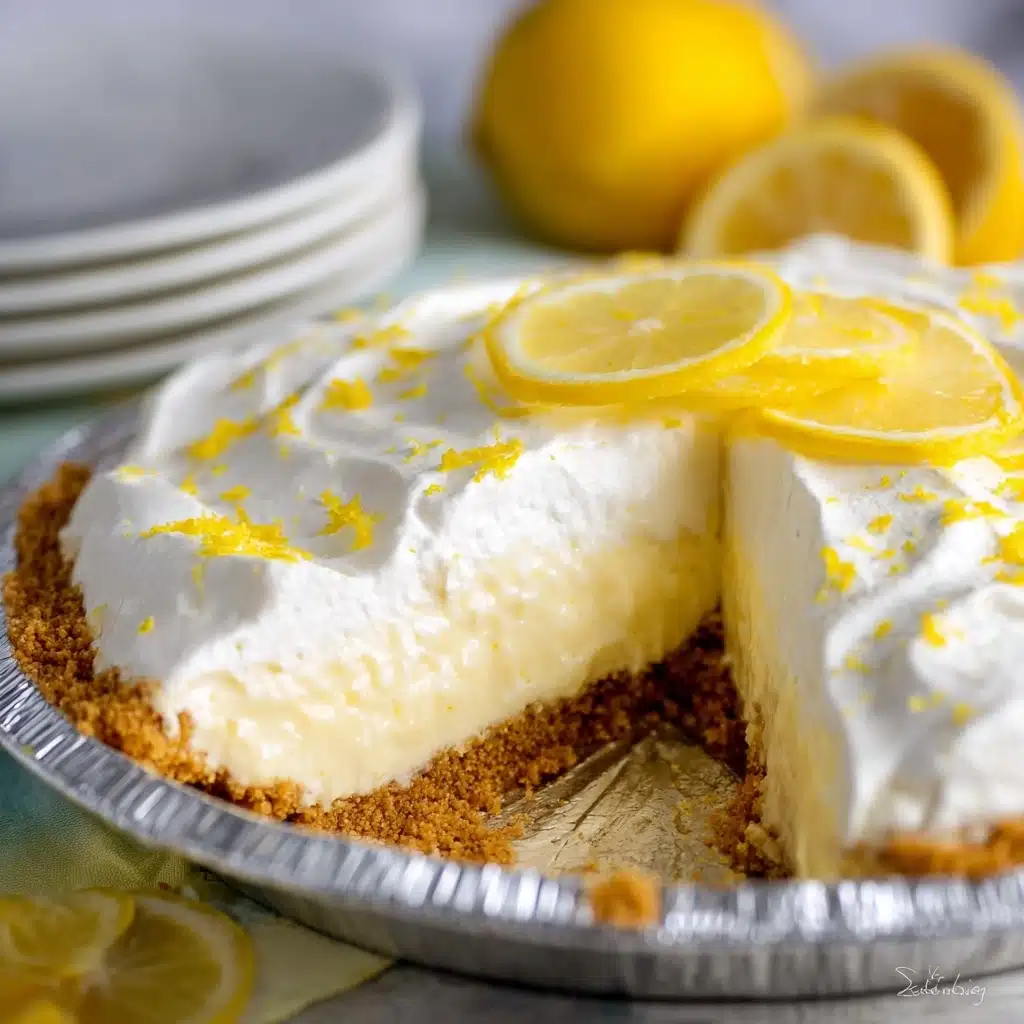
Get ready to fall in love with a dessert that’s as fresh and effortless as a summer breeze: No Bake Lemon Pie! Imagine layers of creamy, lemony filling nestled in a crunchy graham cracker crust, topped with pillowy whipped cream and a sprinkle of vibrant lemon zest. It’s the kind of treat that pulls you back for a second slice before you’ve even finished the first. This is the ultimate fuss-free pie, perfect for gatherings, sunny picnics, or a sweet weeknight escape when the craving for citrusy brightness hits. Trust me, there’s no way you’ll want to miss out on the irresistible charm of No Bake Lemon Pie!

Ingredients You’ll Need
One of the best parts of making No Bake Lemon Pie is how simple yet essential each ingredient is—you only need a handful of pantry staples, and every one of them plays a starring role in creating that perfect balance of creamy, tart, and sweet with just the right texture.
- Graham cracker crumbs (1 1/2 cups): These crumbs are the classic base, providing a crunchy, buttery backdrop for the creamy filling.
- Granulated sugar (1/3 cup): Helps sweeten the crust so it’s more than just a support act for the filling—it’s delicious on its own!
- Unsalted butter, melted (6 tablespoons): Binds the crust together and adds richness and that melt-in-your-mouth quality.
- Cream cheese, room temperature (8 oz): The key to that luscious, tangy filling—make sure it’s soft for easy blending and no lumps.
- Instant lemon pudding mix (3.5 oz): The secret shortcut to lemony flavor and the pie’s ridiculously smooth texture.
- Whole milk (1 ½ cups): Brings everything together, loosens the mixture just enough, and adds a dairy richness to the filling.
- Lemon zest (2 tablespoons total): For that pop of real lemon flavor and color—one tablespoon in the filling, one for garnish.
- Heavy cream, cold (1 cup): Gives you outrageously fluffy, homemade whipped cream for the perfect decadent finish.
- Powdered sugar (2 tablespoons): Adds just the right touch of gentle sweetness to your whipped topping.
- Vanilla extract (1 teaspoon): Enhances the cream, making it taste like an old-fashioned bakery treat.
- Lemon slices, raspberries, and mint: Optional for garnish, but highly recommended for that fresh-from-the-patisserie look and tart-sweet taste.
How to Make No Bake Lemon Pie
Step 1: Make the Graham Cracker Crust
Start by lightly spraying your pie pan with cooking spray. In a small bowl, mix together the graham cracker crumbs, sugar, and melted butter until the mixture resembles wet sand. Pour it into the pan, then use the bottom of a measuring cup to press it in firmly and evenly. Pop the crust in the fridge for at least 30 minutes—it’ll set up beautifully and hold your filling like a dream.
Step 2: Prepare the Lemon Cheesecake Filling
In a medium bowl, beat your room-temperature cream cheese until smooth and creamy (no lumps allowed!). Add the instant lemon pudding mix and keep mixing until everything is velvety and combined. Now, add the whole milk, but here’s a trick: beat it in stages, mixing a little, then letting it sit for a minute or two before mixing again. Do this two or three times so the pudding can thicken up properly and your filling sets perfectly. Finally, stir in a tablespoon of lemon zest for that bold citrus flavor.
Step 3: Assemble the Pie
Pour the lemon cheesecake filling into your chilled crust. Smooth the top with a spatula and cover the pie loosely with plastic wrap. Put it in the fridge and let it chill for at least 3 hours (patience is key—the longer it chills, the better the texture!).
Step 4: Make the Whipped Cream Topping
Grab a large, chilled mixing bowl and add your heavy cream. Using a hand mixer or stand mixer, whip the cream until soft peaks form, then add the powdered sugar and vanilla extract. Keep whipping until stiff peaks hold their shape. The homemade whipped cream really takes your No Bake Lemon Pie over the top.
Step 5: Decorate and Serve
Spread the whipped cream generously over your chilled pie. Sprinkle with more lemon zest for extra zing. If you want to make it truly show-stopping, garnish the top with lemon slices, raspberries, and a few fresh mint leaves right before serving!
How to Serve No Bake Lemon Pie
Garnishes
A great No Bake Lemon Pie deserves to look as irresistible as it tastes. I love showering the top with a cloud of whipped cream and a flurry of lemon zest. Bright, thin lemon slices, a handful of plump raspberries, and a few sprigs of mint add color and make each slice look ready for a celebration!
Side Dishes
Although this pie can easily steal the dessert spotlight, it plays well alongside fresh berries or a fruit salad. For a touch of contrast, serve it with a scoop of vanilla ice cream or some crisp biscotti to turn any meal into a truly memorable finale.
Creative Ways to Present
Try ladling filling into mini graham cracker crusts or glass jars to make adorable single-serve versions. Or present slices on dessert plates dusted with powdered sugar and dotted with extra berries—it’s as elegant as anything you’d find in a café. For gatherings, let everyone garnish their own slice with extra fruit and zest for interactive fun!
Make Ahead and Storage
Storing Leftovers
Store any leftover No Bake Lemon Pie covered loosely with plastic wrap or in an airtight container in the fridge. It’ll stay dreamy and delicious for up to three days—just be sure to keep it chilled so the filling stays set and the crust maintains its texture.
Freezing
Yes, you can freeze slices of No Bake Lemon Pie! Wrap individual slices tightly in plastic wrap and foil, then freeze for up to a month. Thaw overnight in the fridge before enjoying. Note: whipped cream can sometimes lose its texture after freezing, so it’s best to add fresh whipped topping after thawing if you want that perfect finish.
Reheating
No reheating needed here (one of the reasons I adore this pie)—simply slice, serve, and watch it disappear. If it’s a little too cold right out of the fridge, let it sit for 5-10 minutes at room temp for a creamier bite.
FAQs
Can I use a store-bought graham cracker crust instead?
Absolutely! A ready-made crust works perfectly and saves even more time. If you’re craving speed or just don’t want to fuss with crumbs and butter, grab a good-quality premade crust and proceed to the filling—it’s still a true No Bake Lemon Pie.
Can I use low-fat cream cheese or milk?
You can substitute lower fat ingredients if needed, but the filling may be less rich and a touch softer. For best results, stick to the full-fat versions—especially whole milk and cream cheese—which give you that irresistibly creamy texture we all love.
Is it possible to make No Bake Lemon Pie ahead of time?
Definitely! This pie actually benefits from extra chilling time. Make it a day ahead, cover it, and leave it in the fridge until you’re ready to serve. The flavors meld and the texture becomes even dreamier with a little patience.
What can I do if my filling seems runny?
If your filling isn’t setting up, try letting it chill longer—patience usually does the trick. For extra insurance, make sure you added the correct amount of milk (not too much!) and used instant pudding mix, not the cook-and-serve type.
Can I use other pudding flavors?
You bet! While lemon is the classic choice and truly shines here, feel free to experiment with vanilla or even cheesecake-flavored instant pudding for a twist. Add extra zest or a touch of lemon extract to keep that citrusy zing if you swap out the lemon pudding.
Final Thoughts
If you’re looking for a dessert that captures the joy of sun-soaked afternoons and zesty, crowd-pleasing flavors, No Bake Lemon Pie is the answer every time. It’s easy, no-stress, and full of bright, creamy deliciousness. Gather your ingredients and treat yourself—you’ll be glad you did!
PrintNo Bake Lemon Pie Recipe
This easy No Bake Lemon Pie is perfect for hot summer days! Loaded with tart lemon flavor, the creamy lemon filling goes perfectly with the graham cracker crust and fresh whipped cream topping. Delicious!
- Prep Time: 10 minutes
- Total Time: 3 hours 40 minutes
- Yield: 10 servings
- Category: Dessert
- Method: No Bake
- Cuisine: American
- Diet: Vegetarian
Ingredients
Graham Cracker Crust
- 1 1/2 cups graham cracker crumbs
- 1/3 cup granulated sugar
- 6 tablespoons unsalted butter, melted
Lemon Cheesecake Filling
- 8 oz cream cheese, room temperature
- 3.5 oz instant lemon pudding mix
- 1 ½ cups whole milk
- 1 tablespoon lemon zest
Whipped Cream Topping
- 1 cup heavy cream, cold
- 2 tablespoons powdered sugar
- 1 teaspoon vanilla extract
- 1 tablespoon lemon zest
- lemon zest and slices, raspberries and mint to garnish pie
Instructions
- Graham Cracker Crust: Lightly spray a 8″ – 9.5″ pie pan with cooking spray. Set aside. Mix graham cracker crumbs, sugar, and butter in a small bowl. Press the crumb mixture into the prepared pie pan. Use the bottom of a measuring cup to really press the crust down. Chill pie crust for at least 30 minutes before filling.
- Lemon Cheesecake Filling: In a medium bowl, beat cream cheese until smooth. Add pudding mix and beat well until creamy and combined. Add cold milk, beating in increments until creamy, thick and smooth. Beat in lemon zest. Pour mixture into prepared pie shell. Chill for at least 3 hours. The pie will set up firmly during this time.
- Whipped Cream: In a large cold bowl, whip heavy whipping cream until soft peaks form. Add in sugar and extract and continue whipping until stiff peaks form. Spread whipped cream on top of chilled pie. Top with additional lemon zest. Garnish with lemons, mint, and raspberries before serving, if desired.
Notes
- I found that in order to ensure that the pudding set up properly, I beat it in increments. I added the milk all at once, beat it, and let it sit for 1-2 minutes to let it thicken up, before I beat it again. I did this 2-3 times. This is an optional step, but it helps ensure the pudding sets properly.
- When beating your filling, it is better to over mix it than under mix it so that the pudding dissolves completely.
- If your cream cheese isn’t softened enough, you might end up with a lumpy filling, which still tastes delicious, but doesn’t look good.
- A store bought graham cracker crust can be used instead (as I did in the video) if you prefer.
- The graham cracker crust can be baked if you prefer. Preheat oven to 375F. Bake for 7 minutes.
- Instead of using freshly whipped cream, you can also use frozen whipped topping – just thaw first!
- *Recipe updated 3/12/21.
Nutrition
- Serving Size: 1 slice
- Calories: 374 kcal
- Sugar: 14g
- Sodium: 237mg
- Fat: 26g
- Saturated Fat: 15g
- Carbohydrates: 31g
- Fiber: 1g
- Protein: 4g
- Cholesterol: 81mg


