If you’re craving something that’s equal parts crunchy, salty, and decadently chocolatey, these Dark Chocolate and Sea Salt Nut Bars will absolutely hit the spot. Think of your favorite store-bought nut bars, only fresher and more satisfying, with toasty mixed nuts, luscious dark chocolate, and just the right kiss of sea salt in every bite. Best of all, you only need a handful of pantry staples to whip up a batch. Trust me, once you try these homemade treats, they’ll quickly become your new favorite snack for afternoons, dessert trays, or even a lunchbox upgrade!
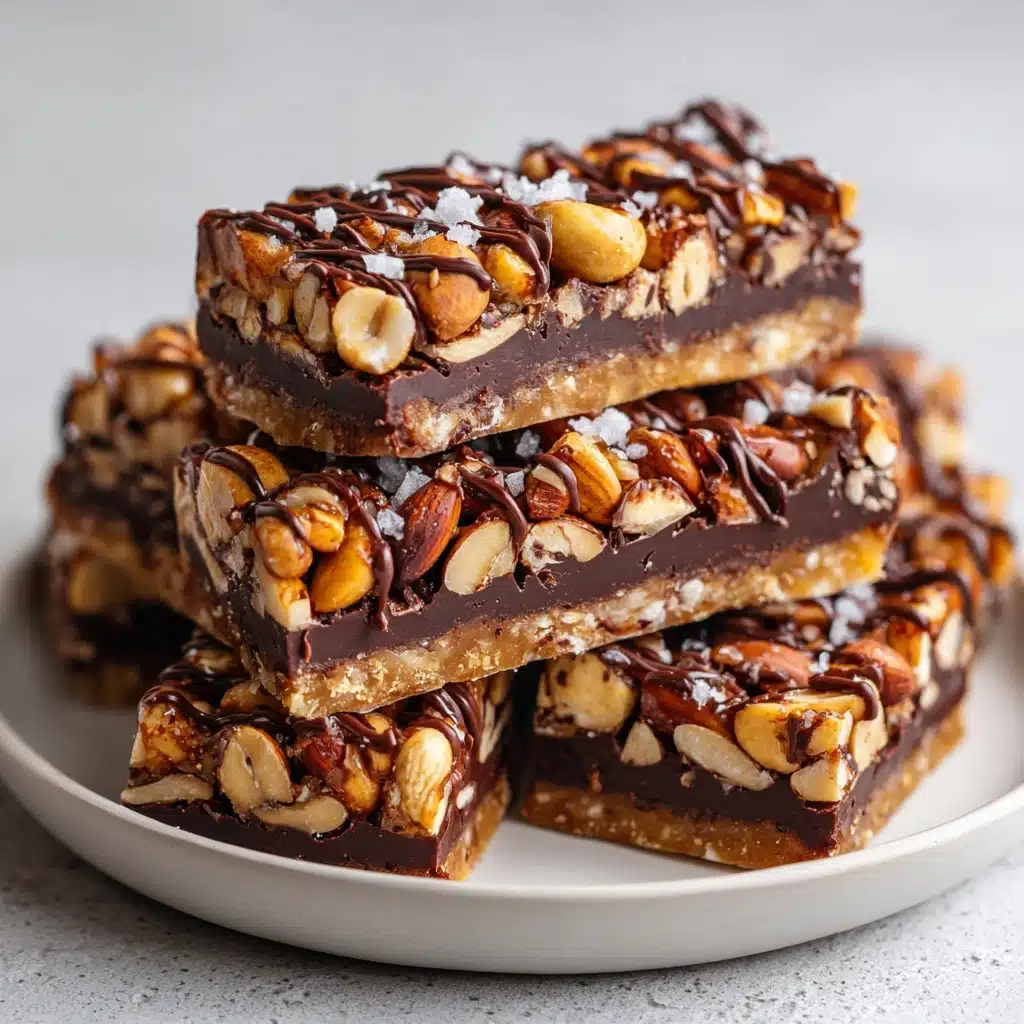
Ingredients You’ll Need
With fewer than ten ingredients, every single component of these bars makes a big impact in taste and texture. Each is simple but totally essential, contributing something special to the overall magic of these Dark Chocolate and Sea Salt Nut Bars.
- Unsalted nuts: Roasting a blend of cashews, peanuts, and almonds gives unbeatable crunch and a deep, nutty flavor for the perfect base.
- Puffed rice: Adds airy lightness and that extra bit of crispy texture to balance out the dense nuts.
- Brown rice syrup: Acts as the glue, binding everything together with gentle sweetness and chewiness (try honey if you can’t find it).
- Vanilla extract: Gives the bars a warm, aromatic note that pulls all the flavors together.
- Sea salt: Enhances the sweetness and brings out the complexity in both the nuts and chocolate.
- Dark chocolate chips: The real indulgence — a deep, rich layer that balances all the other flavors.
- Coconut oil: Ensures that your chocolate melts perfectly smooth and sets up with a beautiful sheen.
- Flaky salt (optional): For that irresistible gourmet sparkle and an extra punch of salty crunch on top.
How to Make Dark Chocolate and Sea Salt Nut Bars
Step 1: Toast the Nuts
To start, preheat your oven to 325˚F (160˚C). Spread your chosen combo of cashews, peanuts, and almonds on a rimmed sheet pan in a single layer. Toast them for 5 to 8 minutes until they’re fragrant and just beginning to brown. This step really wakes up the flavor and is the secret behind that deep, toasty nuttiness in every bite.
Step 2: Prep the Pan
While your nuts cool slightly, line an 8×8-inch pan with parchment paper. Don’t skip this step — it makes removing and slicing the bars a total breeze (and cleanup is so much easier too!). If you like, give it a quick swipe with cooking spray for guaranteed non-stick results.
Step 3: Mix Everything Together
Grab a large mixing bowl and toss together your freshly toasted nuts and the puffed rice. Meanwhile, in a small microwave-safe bowl, warm the brown rice syrup for about 30 seconds so it gets nice and pourable. Whisk in the vanilla extract and sea salt, then pour this syrupy mixture over your nuts and rice. Stir well until everything is totally and evenly coated.
Step 4: Press and Bake
Scoop the sticky nut mixture into your prepared pan and use a spatula (or the back of a spoon) to press it down firmly and evenly. This ensures that your bars hold together once baked! Slide the pan into the oven and bake for 18 to 20 minutes. When done, let the bars cool in the pan for about 30 minutes before moving on.
Step 5: Slice the Bars
Once your tray is mostly cool, transfer the slab onto a cutting board. Cut in half lengthwise, then slice each half into 5 or 6 bars. Aim for even, thin bars for that classic look. Leave them to cool off completely — this helps them set and holds their shape for dipping later.
Step 6: Melt the Chocolate
Time for everyone’s favorite part! Add your dark chocolate chips and coconut oil to a microwave-safe bowl. Microwave in 30-second bursts, stirring after each one, until the chocolate is luscious and glossy. The coconut oil helps thin it out and gives each bar a smooth, shiny coating.
Step 7: Dip, Drizzle, and Garnish
Take each bar and dip the bottom into the melted chocolate, letting any excess drip off. Arrange them on a parchment-lined baking sheet. Drizzle what’s left of the chocolate over the tops, then sprinkle with a pinch of flaky salt if you love that hit of savory crunch. Pop the tray into the fridge and let the chocolate set until firm.
How to Serve Dark Chocolate and Sea Salt Nut Bars
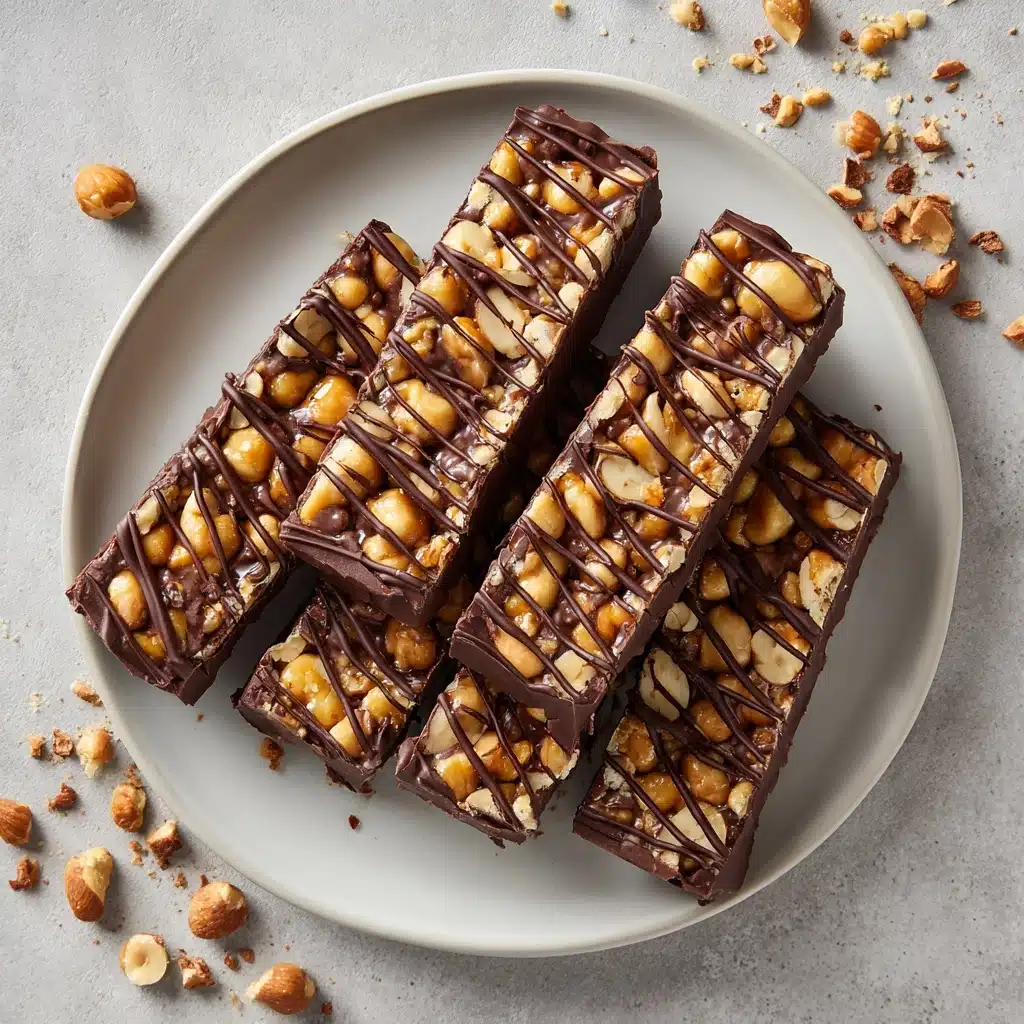
Garnishes
For added wow factor, sprinkle extra flaky salt or even a dusting of crushed freeze-dried berries right before the chocolate sets. A drizzle of white chocolate or a sprinkle of toasted coconut can make these bars look bakery-worthy and taste even more luxurious.
Side Dishes
These bars pair beautifully with a cup of strong coffee, a cappuccino, or a tall glass of cold milk for an afternoon pick-me-up. For a brunch spread, serve alongside a bowl of mixed fruit or a platter of cheeses for contrast and variety.
Creative Ways to Present
Wrap individual bars in wax paper and tie with string for adorable lunchbox treats or holiday gifts. Stack bars in a pretty jar or tin as a handmade hostess gift, or plate them up with fresh berries for a show-stopping snack tray at parties.
Make Ahead and Storage
Storing Leftovers
Keep your Dark Chocolate and Sea Salt Nut Bars fresh and crunchy by storing them in an airtight container at room temperature for up to a week. For best results, place pieces of parchment between the layers to keep them from sticking together.
Freezing
If you want to make a big batch, these bars freeze wonderfully! Layer them with parchment in a freezer-safe container or bag. They’ll keep for several months and can be enjoyed straight from the freezer or after a quick thaw at room temp.
Reheating
While these bars don’t technically need reheating, if you like your chocolate just a little soft and gooey, zap a bar in the microwave for about 10 seconds. You’ll get that irresistibly melty chocolate texture without turning the whole thing into a puddle.
FAQs
What can I use if I don’t have brown rice syrup?
If brown rice syrup isn’t available, you can swap in honey for a similar sticky texture, though the bars might be a bit more chewy. Maple syrup or agave can work in a pinch, but the bars may not bind as firmly.
How do I keep my bars from sticking to the pan?
Lining your pan thoroughly with parchment paper is key, and a light coat of cooking spray can also help. Once baked and cooled, just lift the whole slab out using the paper — no more broken bars!
Can I use different nuts in this recipe?
Absolutely! Customize the nut blend with whatever you love: pecans, hazelnuts, pistachios, or walnuts all work beautifully. Just be sure to keep the total amount at 2 1/2 cups for the best results.
How do I prevent chocolate “feet” on my bars?
Let any excess melted chocolate drip off the bar before setting it on parchment. This keeps the chocolate layer neat, even, and just the right thickness underneath each nut bar.
Do I have to add the sea salt on top?
While optional, that finishing touch of flaky salt brings out the rich chocolate flavor and balances the sweetness. It’s definitely recommended for that classic Dark Chocolate and Sea Salt Nut Bars experience!
Final Thoughts
If you’re searching for a make-ahead snack or a dazzling homemade treat, give these Dark Chocolate and Sea Salt Nut Bars a try. They’re easy, deeply satisfying, and so much better than anything store-bought. You’ll love every sweet, salty, crunchy bite!
PrintDark Chocolate and Sea Salt Nut Bars Recipe
Crunchy, salty, and delicious, these Dark Chocolate and Sea Salt Nut Bars are a homemade treat that’s easy to make and perfect for snacking. Packed with nuts, chocolate, and a hint of sea salt, these bars are a satisfying and indulgent snack.
- Prep Time: 20 minutes
- Cook Time: 25 minutes
- Total Time: 1 hour 15 minutes
- Yield: 10-12 bars
- Category: Snack/Dessert
- Method: Baking
- Cuisine: American
- Diet: Gluten Free
Ingredients
For the Bars:
- 2 1/2 cups unsalted nuts of choice (we use 3/4 cup cashews, 3/4 cup peanuts, and 1 cup almonds)
- 1/2 cup puffed rice
- 1/4 cup brown rice syrup
- 1 1/2 teaspoon vanilla extract
- 1/2 teaspoon sea salt
For the Chocolate Coating:
- 1 cup dark chocolate chips
- 2 teaspoons coconut oil
- Optional: flaky salt for topping
Instructions
- Preheat oven to 325˚F / 160˚C. Spread the nuts on a sheet pan and bake until fragrant.
- Prepare the Pan: Line an 8×8-inch pan with parchment paper.
- Mix Nuts and Rice: Combine nuts and puffed rice in a bowl.
- Prepare Syrup Mixture: Microwave brown rice syrup, then mix with vanilla extract and salt. Pour over nut mixture.
- Form Bars: Press nut mixture into the prepared pan and bake.
- Cut Bars: Cool baked mixture, cut into bars, and transfer to a cutting board.
- Coat with Chocolate: Melt chocolate and coconut oil, dip bars, and drizzle with chocolate.
- Set and Enjoy: Refrigerate until set and indulge!
Notes
- If you can’t find brown rice syrup, honey can be used as an alternative.
- Store bars in an airtight container at room temperature or in the freezer, separated by parchment paper layers.
- Line the pan with parchment paper and cooking spray to prevent sticking.
- Adding coconut oil to chocolate helps with thinning and setting.
- Allow excess chocolate to drip off bars to prevent a large chocolate ‘foot’.
Nutrition
- Serving Size: 1 bar
- Calories: 248
- Sugar: 10.3g
- Sodium: 68.2mg
- Fat: 18.1g
- Saturated Fat: 9.3g
- Unsaturated Fat: 7.3g
- Trans Fat: 0g
- Carbohydrates: 17.3g
- Fiber: 3.2g
- Protein: 6.9g
- Cholesterol: 0mg






itstitle
excerptsa