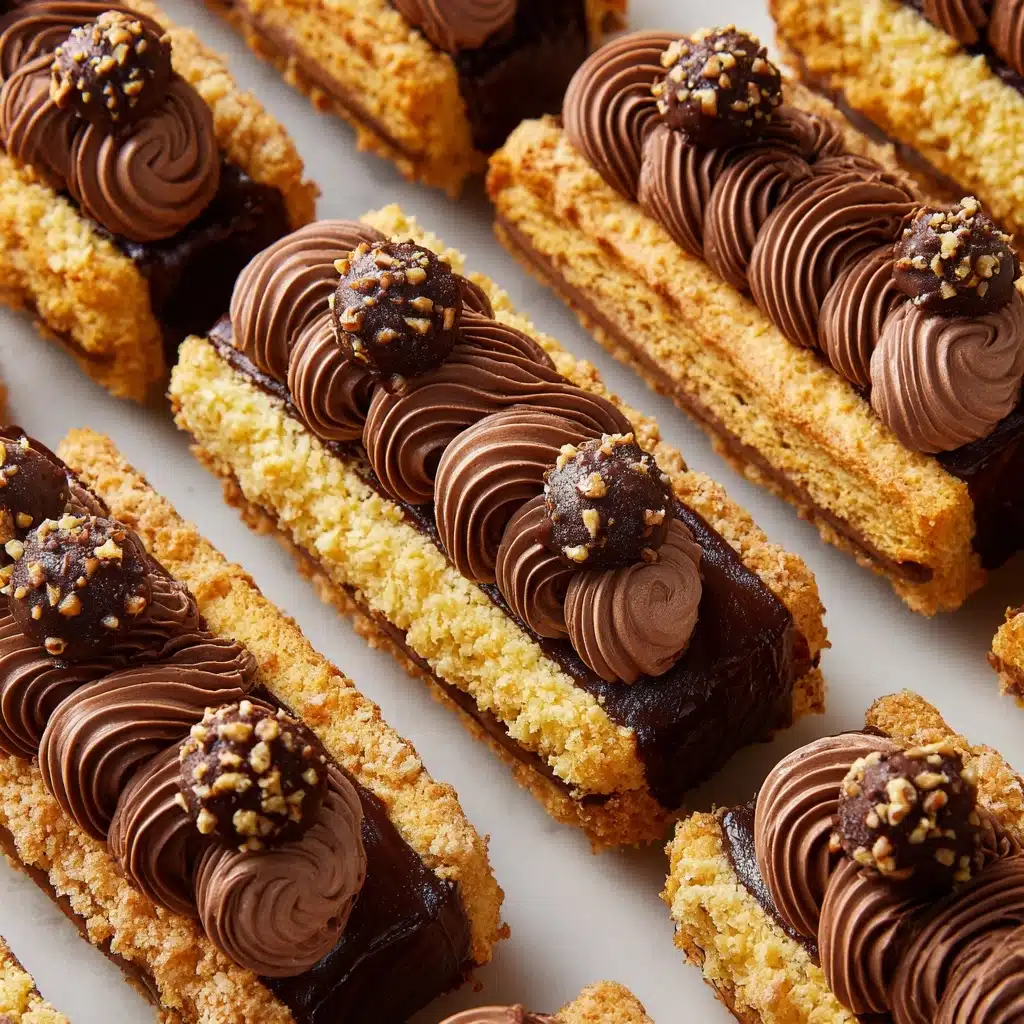
If you’re searching for a show-stopping treat that’s a breeze to prepare, the No Bake Ferrero Rocher Dessert is your new go-to delight. Imagine crisp ladyfingers layered with a cloud-like mascarpone-chocolate filling, dipped in rich chocolate and rolled in crunchy hazelnuts, all coming together in the spirit of your favorite luxurious truffle. Every bite is an irresistible mix of flavors and textures that’s sure to impress at parties, coffee breaks, or any moment when your sweet tooth calls! Whether you’re a confident baker or a dessert dabbler, there’s simply nothing easier or more rewarding than this no-fuss, no-oven-needed creation.
Ingredients You’ll Need
Every ingredient in this No Bake Ferrero Rocher Dessert plays a key role in creating its indulgent layers and classic flavor. From crisp cookies to creamy mascarpone and crunchy nuts, these simple staples transform into something truly special when combined.
- Ladyfingers: These light, crisp cookies bring structure and a lovely delicate crunch that softens just enough as they soak up flavor.
- Mascarpone: This rich Italian cream cheese is the secret to an ultra-smooth, luxurious filling.
- Chocolate spread: Chocolate-hazelnut spread (like Nutella) gives both depth and sweetness as a key layer and chocolate bath.
- Milk: The base for the chocolate mixture, which helps transform dry cookies into melt-in-your-mouth bites.
- Hazelnuts: Chopped and pressed onto each dessert for iconic Ferrero Rocher flair and unbeatable crunch.
How to Make No Bake Ferrero Rocher Dessert
Step 1: Prepare the Creamy Filling
Start by mixing the mascarpone and chocolate spread together until you have a perfectly smooth, evenly blended cream. Set aside about 40 grams of this mixture in a separate bowl, which you’ll use later to coat the sides and make the finishing touch extra pretty. Spoon the rest into a piping bag to keep things neat and easy when assembling your No Bake Ferrero Rocher Dessert.
Step 2: Whip Up the Chocolate Mixture
Gently heat the milk in a pan just until it’s about to simmer, then take the pan off the heat and stir in your remaining chocolate spread. Keep stirring until the chocolate completely melts and you have a silky, glossy mix. Let it cool all the way to room temperature—patience here helps keep your cookies from getting too soggy in the next step.
Step 3: Sandwich the Ladyfingers
Grab a ladyfinger and pipe a generous dollop of that creamy chocolate-mascarpone filling right on top. Press another ladyfinger on top to make a sandwich. Don’t be shy about pressing them together—they’ll hold their shape, and the filling will spread out just enough to make that first perfect bite.
Step 4: Coat the Sides with Cream
Now take the cream you set aside earlier and use a small spatula (or the back of a spoon) to cover the sides of your ladyfinger sandwiches. This thin layer helps the hazelnuts stick, giving each No Bake Ferrero Rocher Dessert its signature crunch and a little extra creaminess with every mouthful.
Step 5: Dip and Roll in Hazelnuts
Working one at a time, quickly dip each dessert into the cooled chocolate mixture, just enough to coat the outside without making it too wet. Immediately press or roll the sides into your chopped hazelnuts so the nuts cling nicely to the cream.
Step 6: Set on Liners
Carefully place each finished piece on a small cupcake liner or decorative paper. Not only does this make the desserts look extra polished, but it also keeps them tidy and easy to grab at parties.
Step 7: The Final Creamy Flourish
To finish, pipe a small swirl of cream on top of each No Bake Ferrero Rocher Dessert using your piping bag, ideally with a star-shaped nozzle for that fancy bakery look. For a final optional flourish, press a whole hazelnut or chocolate piece into the top. Pure magic!
How to Serve No Bake Ferrero Rocher Dessert
Garnishes
Garnishing these beauties is one of the best parts! After piping on that final swirl of cream, top each one with a whole hazelnut, a piece of dark chocolate, or even a sprinkle of chocolate shavings for dramatic flair. Want more texture? Extra chopped hazelnuts or a dusting of gold sprinkles add a festive finish to your No Bake Ferrero Rocher Dessert spread.
Side Dishes
Although these treats are stunning on their own, they pair wonderfully with a scoop of vanilla ice cream or a fresh fruit salad—think sweet strawberries or juicy raspberries for a refreshing contrast. For a cozy coffee time, serve your No Bake Ferrero Rocher Dessert with espresso, cappuccino, or even a cup of strong black tea.
Creative Ways to Present
Presentation is half the fun! Arrange your desserts in decorative cupcake papers on a large serving platter, or nestle them in mini truffle boxes if you want to hand them out as elegant edible gifts. For parties, build a little “dessert tower” by stacking the pieces pyramid-style. However you display them, watch the compliments roll in!
Make Ahead and Storage
Storing Leftovers
If you happen to have leftovers (though that’s rare!), store your No Bake Ferrero Rocher Dessert in an airtight container in the fridge. They’ll stay fresh and firm for up to three days, making them ideal for prepping ahead before a party.
Freezing
While these are best enjoyed fresh, you can freeze them if needed. Place on a baking sheet until solid, then transfer to a freezer-safe container with parchment between layers. Thaw overnight in the fridge for the best texture—the cream may soften just a bit, but the flavor remains decadent!
Reheating
Luckily, there’s no need to reheat this dessert—these little treats are meant to be enjoyed cold or at room temperature. If yours have been in the fridge for a while, let them sit out for 10 minutes so the filling softens slightly before serving.
FAQs
Can I use a different type of cookie instead of ladyfingers?
Absolutely! While ladyfingers give a classic, delicate texture, you can substitute with other crisp cookies like butter biscuits or graham crackers if that’s what you have on hand. Just keep in mind that cookie size and thickness may affect assembly time and texture.
Is there a way to make the No Bake Ferrero Rocher Dessert nut-free?
Sure! Simply skip the hazelnuts or roll the sides in a nut-free crunchy topping like crisped rice cereal or toasted coconut. And, of course, use a chocolate spread that doesn’t contain nuts for the filling and coating.
How far in advance can I make these desserts?
You can assemble them up to 24 hours ahead and keep them tightly covered in the fridge. This actually helps the flavors meld together and gives the dessert a wonderful, cohesive bite!
Do I need any special equipment?
Not really! A piping bag makes the process neater, but a small sandwich bag with a corner snipped off will work in a pinch. Everything else you need is probably already in your kitchen.
What’s the best way to chop hazelnuts for this recipe?
The quickest method is to pulse the nuts in a food processor until coarsely chopped. No food processor? Place the hazelnuts in a zip-top bag and crush lightly with a rolling pin—it’s almost as satisfying as eating the finished dessert!
Final Thoughts
This No Bake Ferrero Rocher Dessert is pure indulgence, with a simple recipe anyone can master. Whether you’re treating yourself or sharing with friends, you’ll love how fast and fabulously these come together. Give it a try and let every creamy, crunchy bite melt your cares away!
PrintNo Bake Ferrero Rocher Dessert Recipe
Looking for an easy, no-bake dessert that’s guaranteed to impress? These hazelnut treats are your answer! With layers of crispy ladyfingers, creamy mascarpone-chocolate filling, and a crunchy hazelnut coating, this indulgent dessert is as simple to make as it is delicious. Perfect for birthdays, coffee breaks, or satisfying a sweet craving, these treats come together in no time—no oven needed! Whether you’re a dessert pro or just dipping your toes into the kitchen, this recipe is foolproof. And the combination of chocolate and hazelnuts? Absolutely irresistible!
- Prep Time: 30 minutes
- Total Time: 30 minutes
- Yield: 8 servings
- Category: Dessert
- Method: No-Bake
- Diet: Vegetarian
Ingredients
Cream:
- 250g mascarpone
- 250g chocolate spread
Chocolate Mixture:
- 150ml milk
- 55g chocolate spread
Garnish:
- Hazelnuts
Instructions
- Mix the mascarpone and chocolate spread until smooth. Set aside 40g of the cream mixture and place the rest in a piping bag.
2 Heat the milk in a pan until it boils. Turn off the heat and add the chocolate spread. Stir until smooth and let it cool to room temperature.
3 Take a ladyfinger and pipe a dollop of cream on it. Place another ladyfinger on top and press firmly.
4 Spread the sides with the reserved cream mixture.
5 Briefly dip in the chocolate mixture. Then coat the sides with the finely chopped hazelnuts.
6 Place the hazelnut pastry on a small paper liner.
7 Pipe a dollop of cream on top for the finishing touch.
Notes
- Make sure the mascarpone and chocolate spread are at room temperature.
- Let the chocolate mixture cool completely. If it’s too warm, the ladyfingers may become soggy and fall apart.
- Use a piping bag with a star-shaped nozzle for a decorative dollop on top.
- Optionally, add a piece of chocolate or a whole hazelnut on top of the cream dollop.
- As an alternative, you can use chocolate shavings or sprinkles alongside or instead of the hazelnuts.
- Serve the pastries in small cupcake liners or on a decorative plate.
- These pastries are perfect to make a few hours in advance. Store them in the fridge to keep them firm.


