If you’ve ever dreamed of biting into a pillow-soft bun that melts in your mouth, then this No Knead Milk Buns – Soft and Fluffy Recipe is about to become your new favorite. With just a handful of simple ingredients and a little patience, you will get irresistibly tender milk buns that boast a perfectly airy crumb and delicate sweetness. These buns are not only easy to prepare but also carry that homemade charm that makes every bite feel special. Trust me, once you make these, you’ll never want to go back to store-bought buns again!
Ingredients You’ll Need
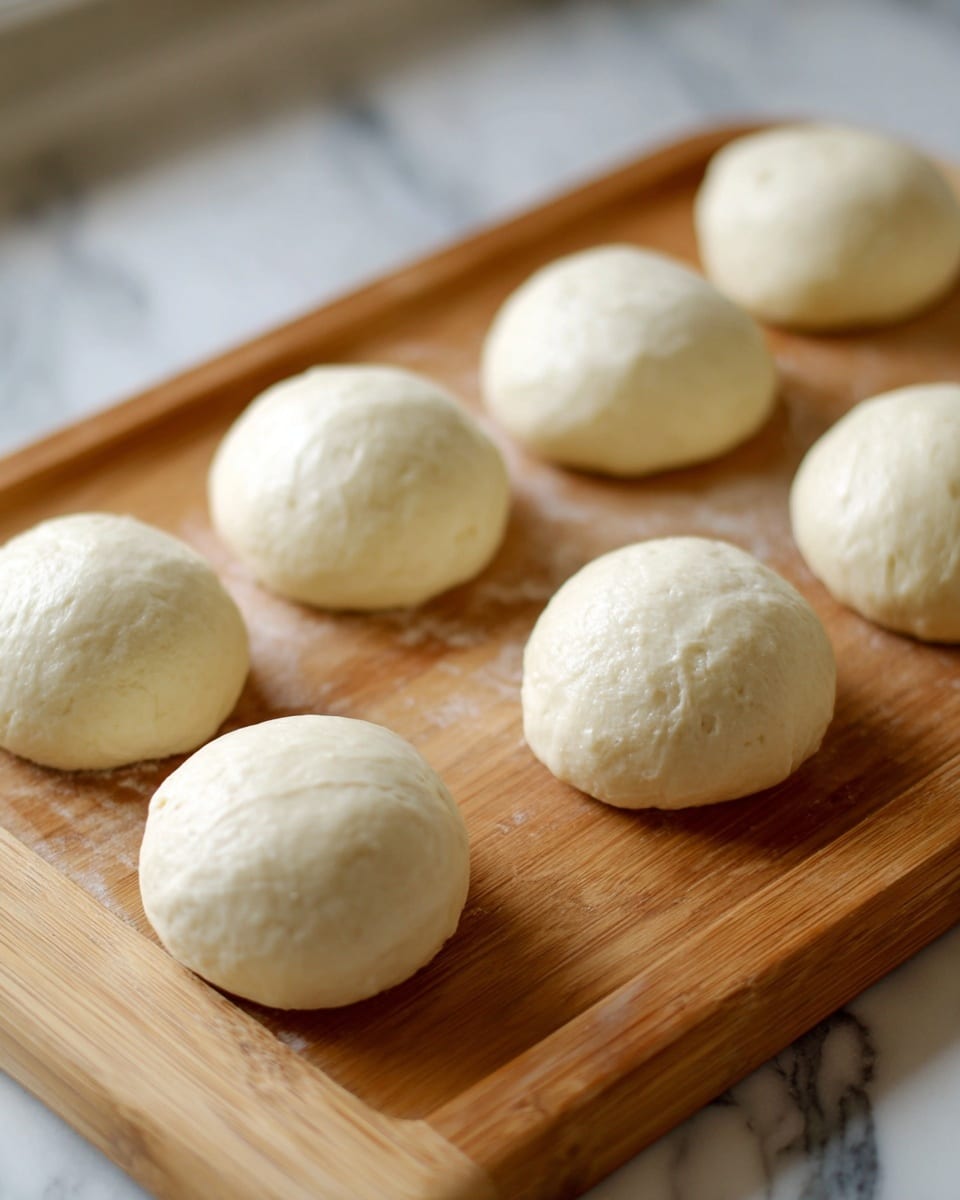
What’s wonderful about this No Knead Milk Buns – Soft and Fluffy Recipe is how straightforward and essential the ingredients are. Each one plays a key role in creating that soft texture, lovely flavor, and golden color that makes these buns so irresistible.
- Bread flour: The high protein content helps create that chewy, light texture you’re after.
- Lukewarm milk: Adds richness and tenderness while activating the yeast effectively.
- Instant yeast: For effortless rising without the fuss of proofing.
- Sugar: Sweetens gently and feeds the yeast for a good rise.
- Egg: Provides structure and a beautiful golden hue to the buns.
- Olive oil: Keeps the buns moist and adds a subtle depth of flavor.
- Salt: Balances sweetness and enhances all the flavors.
- Melted butter: Brush on top for a shiny, soft, and rich finish after baking.
You’ll find the full ingredient list, instructions, and print option in the recipe card below.
How to Make No Knead Milk Buns – Soft and Fluffy Recipe
Step 1: Mix Wet Ingredients and Activate Yeast
Start by preparing a mixing container and adding lukewarm milk heated between 100 and 110ºF. Mix in the egg and sugar thoroughly, ensuring everything blends smoothly. Then sprinkle the instant yeast on top and stir until fully incorporated. This step wakes up the yeast and sets the stage for that gorgeous rise you’re aiming for.
Step 2: Combine Dry Ingredients and Form Dough
Next, add the bread flour, olive oil, and salt directly into the container. Use a silicone spatula to stir the mixture until the flour is fully hydrated and no dry spots remain. This only takes a minute or two thanks to the no-knead method, so resist the urge to overwork the dough — its gentle handling is key to softness.
Step 3: First Rise – Let the Dough Double
Cover your container tightly with a lid or cling film to prevent drying out. Leave it at room temperature to ferment and double in size, which should take about an hour. Watching the dough grow like this is always so rewarding, and it develops flavor naturally without any tough effort.
Step 4: Gentle Folding
Once doubled, open the container and use the spatula to fold the dough gently: fold from right to left, then front to back, followed by left to right and back to front. Repeat this folding twice in total. This light handling improves the texture, building delicate layers without traditional kneading.
Step 5: Portion and Shape
Pour some flour onto your work surface to stop any sticking, then dust your hands and the dough as well. Divide the dough into 8 equal parts using a dough scraper or knife. Shape each portion into a round ball, cover them with a dry cloth, and let them rest for 15 minutes — this brief rest helps them become plump and easier to shape fully.
Step 6: Final Shaping and Second Rise
Press each dough ball gently on both sides once more and reshape them into neat rounds. Arrange them spaced apart on a lined baking sheet or inside a container, then cover again and allow them to rise until doubled — usually about an hour. This second rise ensures those irresistible fluffy interiors.
Step 7: Bake to Perfection
Preheat your oven to 350°F (175°C). Just before baking, brush the tops with milk to encourage a lovely golden finish. Bake the buns for 15 minutes or until they look perfectly puffed and golden on top — your kitchen will smell like heaven at this point!
Step 8: Add the Finishing Touch
Once out of the oven, generously brush the buns with melted butter for an extra layer of shine and richness. Let them cool slightly or serve warm — these buns are outstanding fresh from the oven!
How to Serve No Knead Milk Buns – Soft and Fluffy Recipe
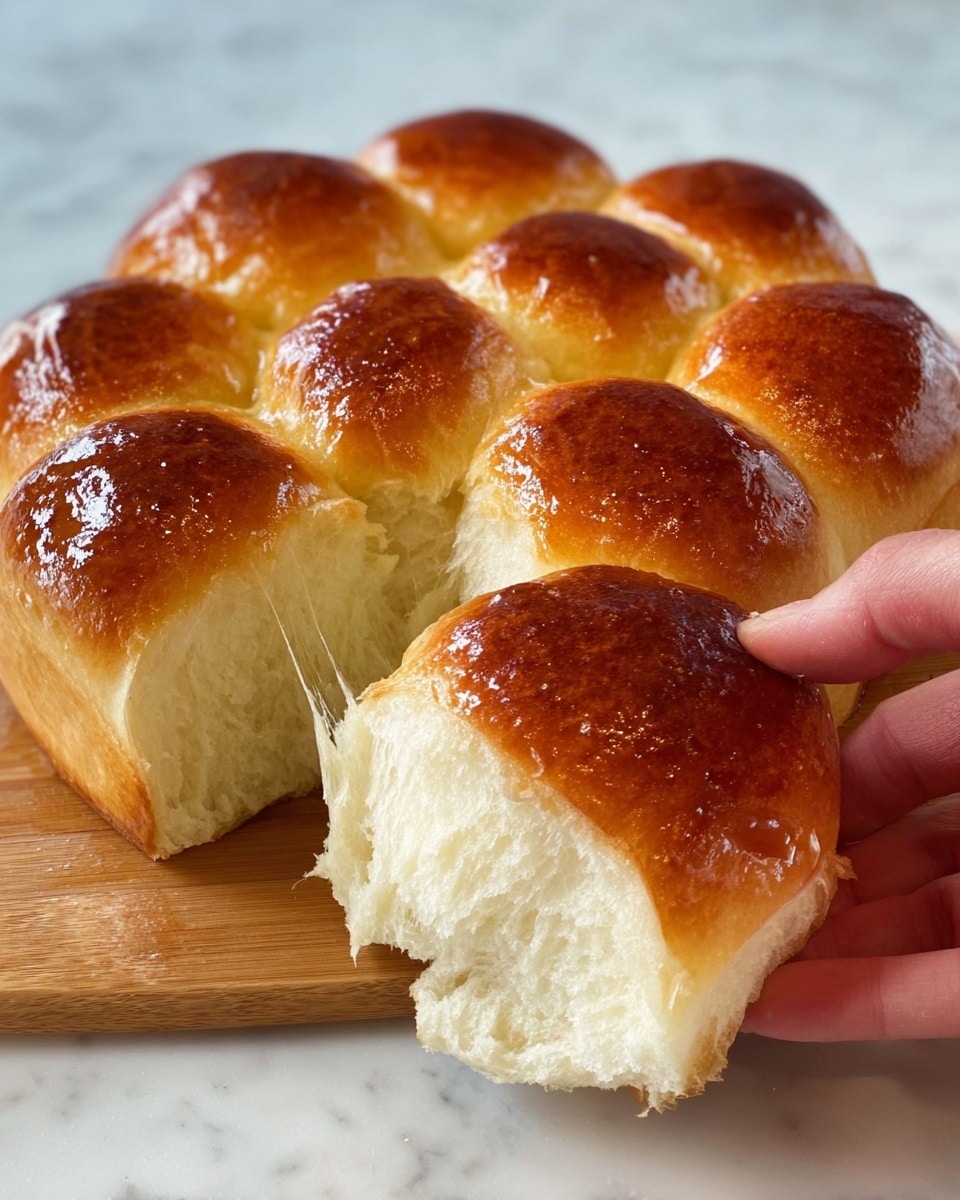
Garnishes
These milk buns are a perfect blank canvas for garnishes. A sprinkle of sesame seeds, poppy seeds, or even a light dusting of powdered sugar can elevate their look and flavor beautifully. You could also brush with a little honey or jam for sweetness that shines.
Side Dishes
They pair wonderfully with classic breakfast accompaniments like scrambled eggs, crispy bacon, or fresh fruit preserves. For lunch or dinner, use the buns as a base for sliders, mini sandwiches filled with pulled pork, or serve alongside hearty soups to soak up all the flavors.
Creative Ways to Present
For a fun twist, slice the buns horizontally and toast lightly, then spread with flavored butters or creamy cheeses. Another idea is to transform them into a sweet treat by slicing in half, spreading Nutella or peanut butter, and topping with banana slices or berries. The soft texture makes these buns incredibly versatile for both savory and sweet creations.
Make Ahead and Storage
Storing Leftovers
Store leftover buns in an airtight container or resealable bag at room temperature for up to 2 days. This keeps them soft and fresh, ready to be enjoyed anytime without losing that signature fluffiness.
Freezing
You can freeze these milk buns by wrapping each one tightly in plastic wrap, then placing them in a freezer-safe bag. They keep well for up to 3 months. When ready, just thaw them at room temperature or warm gently in the oven.
Reheating
To bring these buns back to life, pop them in a 300°F (150°C) oven for about 10 minutes or microwave for 15-20 seconds wrapped in a damp paper towel. Either method restores softness and warmth that feels freshly baked.
FAQs
Can I use all-purpose flour instead of bread flour?
Yes, you can substitute all-purpose flour, but the texture may be slightly less chewy and not quite as airy. Bread flour’s higher protein content helps develop the perfect structure for soft and fluffy buns.
Why is there no kneading involved in this recipe?
The no-knead method relies on time and gentle folding to develop gluten naturally. This technique simplifies the process while producing incredibly tender buns, making bread baking approachable and fun for everyone.
Can I make these buns vegan?
Absolutely! Replace the milk with a plant-based alternative like almond or oat milk, use a flax or chia egg instead of a regular egg, and swap butter for a vegan margarine. The buns will still turn out soft and delicious.
How important is the milk temperature?
Milk should be lukewarm (about 100-110ºF) to activate the yeast effectively without killing it. Too hot, and the yeast won’t work well; too cold, and the rise will be slow. A cozy warm milk helps the dough rise just right.
Can I double the recipe?
Yes, doubling the ingredients works well, just be sure to use a large enough container for rising and allow adequate fermentation time. Larger dough quantities may take a bit longer to double in size.
Final Thoughts
There’s something truly comforting and joyous about making your own No Knead Milk Buns – Soft and Fluffy Recipe. It’s a delightful baking project that feels forgiving yet rewarding, with results that taste like a warm hug from your oven every time. Give these milk buns a try and watch how quickly they become a staple in your kitchen — soft, tender, flavorful, and utterly irresistible!
PrintNo Knead Milk Buns – Soft and Fluffy Recipe
These No Knead Milk Buns are soft, fluffy, and irresistibly tender with a rich, slightly sweet flavor. Perfect for sandwiches or enjoyed warm with butter, this easy recipe requires minimal effort with no kneading involved, making it ideal for home bakers seeking delicious homemade bread with minimal fuss.
- Prep Time: 20 minutes
- Cook Time: 15 minutes
- Total Time: 2 hours 25 minutes
- Yield: 8 milk buns
- Category: Bread
- Method: Baking
- Cuisine: Western
- Diet: Vegetarian
Ingredients
Dry Ingredients
- 2.25 cups Bread flour (350g)
- 0.5 tbsp Instant yeast (4g)
- 3 tbsp Sugar (38g)
- 0.5 tsp Salt (3g)
Wet Ingredients
- 1 cup Lukewarm milk (230ml) at 100-110ºF
- 1 Egg
- 1 tbsp Olive oil (15g)
- Melted butter, for brushing
Instructions
- Prepare the Yeast Mixture: In a container, combine lukewarm milk (around 100-110ºF), egg, and sugar. Mix well until combined, then add the instant yeast and stir to incorporate thoroughly.
- Form the Dough: Add bread flour, olive oil, and salt to the yeast mixture. Stir vigorously with a silicone spatula until the dough comes together and no dry flour remains, about 1 to 2 minutes.
- First Proofing: Cover the container tightly with a lid or cling film. Let the dough ferment at room temperature until it doubles in size, about 1 hour.
- Fold the Dough: With the lid or wrap removed, use the silicone spatula to fold the dough in four directions: right to left, front to back, left to right, and back to front. Repeat this folding sequence twice to strengthen the dough.
- Prepare the Surface: Sprinkle flour on your work surface to prevent sticking. Then pour the dough onto the floured surface.
- Divide the Dough: Dust the dough and your hands lightly with flour. Using a plastic dough scraper, divide the dough into 8 equal portions.
- Shape the Buns: Roll each portion into a round ball. Cover them with a dry cloth and let rest for 15 minutes to relax the dough.
- Second Shaping and Rising: Lightly press each dough ball on both sides, reshape into rounds, and place them on a baking sheet or container. Cover and let them rise until doubled, about 1 hour.
- Preheat and Prepare for Baking: Preheat the oven to 350°F (175°C). Just before baking, brush the top of each dough ball with milk for a glossy finish.
- Bake the Buns: Bake in the preheated oven at 350°F (175°C) for 15 minutes until golden and cooked through.
- Finish with Butter: Once baked, brush the warm milk buns with melted butter for added richness and shine. Serve warm or at room temperature.
Notes
- Ensure the milk is lukewarm (100-110ºF) to activate the yeast properly.
- The first fermentation is crucial to develop flavor and texture; do not rush this step.
- Folding the dough gently helps build strength without kneading.
- Using a plastic dough scraper facilitates easy portioning and handling of sticky dough.
- You can store the baked buns in an airtight container for up to 2 days or freeze for longer storage.
- For extra flavor, you can sprinkle seeds like sesame or poppy on top before baking.

