Get ready for some festive fun with this Easy Decorated Halloween Cupcakes Recipe that you and your friends will absolutely adore. These cupcakes are not just delicious but also a playful canvas for your creativity, featuring charming monsters, jack-o’-lanterns, and spiders. Whether you choose pumpkin cupcakes or your favorite base, the vibrant, smooth vanilla buttercream transforms these treats into Halloween masterpieces. Decorating these cupcakes is a joyous activity anyone can master, guaranteed to bring smiles and lots of “ooohs” and “aahs” at your next spooky celebration!
Ingredients You’ll Need
Ingredients You’ll Need
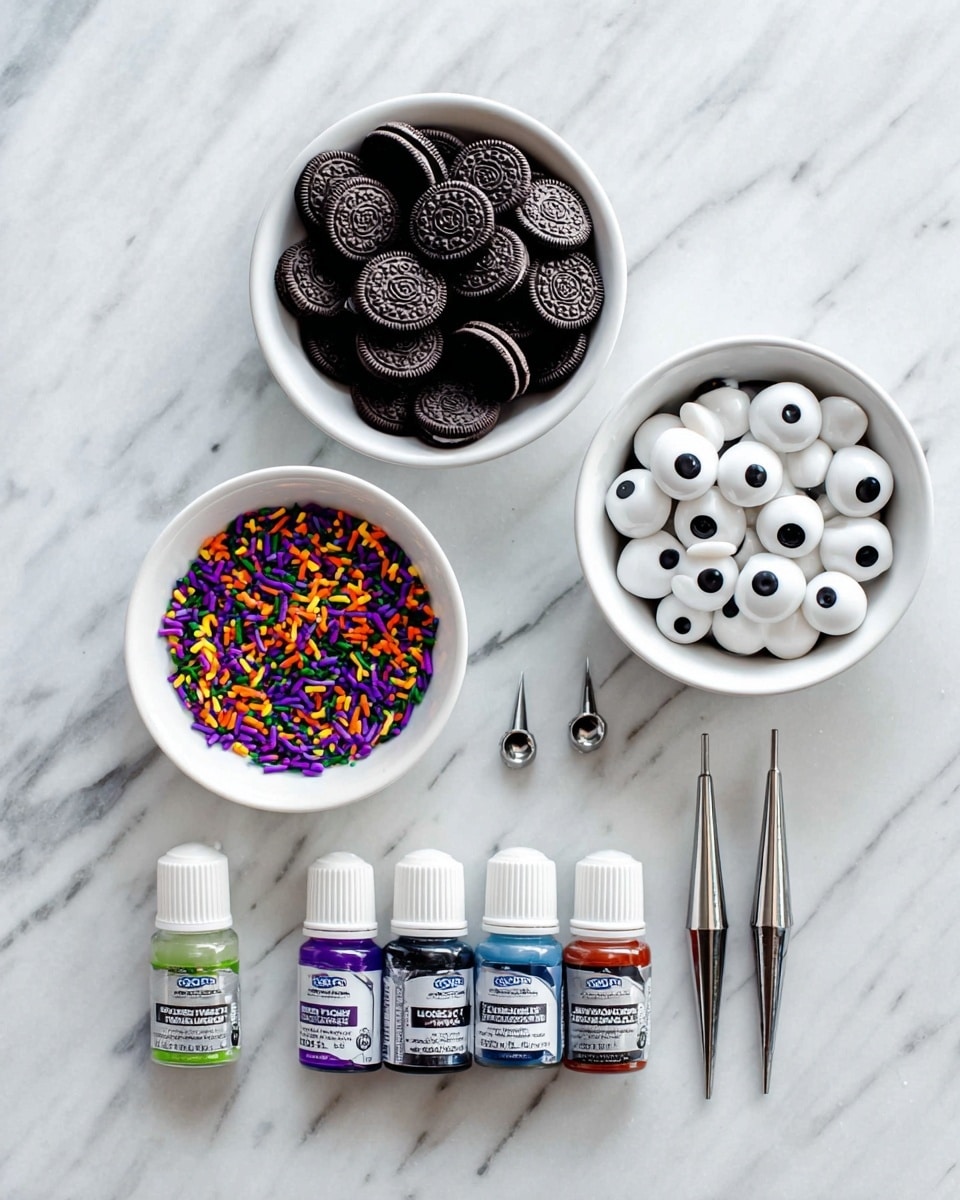
The ingredients for this Easy Decorated Halloween Cupcakes Recipe are straightforward but essential, giving you that perfect balance of sweetness, color, and texture to wow everyone. Each component plays a vital role, from the creamy butter in the frosting that creates luxurious texture, to the vivid gel food colorings that bring your Halloween designs to life.
- 12 pumpkin cupcakes or your favorite cupcake recipe: The base that’s moist and flavorful, setting the stage for your decorations.
- Vanilla Buttercream: Rich and creamy frosting that’s easy to tint and pipe flawlessly.
- 1 and 1/2 cups (340g) unsalted butter, softened: Provides that smooth, spreadable texture we love in buttercream.
- 6 cups (720g) confectioners’ sugar: Sweetness that’s fine and powdery, perfect for a silky frosting.
- 6 Tablespoons (60ml) heavy cream, half-and-half, or whole milk: Adds creaminess and helps adjust the frosting’s consistency.
- 2 teaspoons pure vanilla extract: Classic flavor enhancer that warms every bite.
- Gel food coloring (Leaf Green, Fuchsia + Violet, Super Black, Orange): Intense color without thinning your frosting.
- Small and large candy eyeballs: Adorable edible decorations that make your creatures come alive.
- Optional sprinkles: For extra sparkle and fun on your monster cupcakes.
- Piping bags and tips: Essential tools for detailed and precise decorating.
- Oreo Mini cookies (for spider legs): A crunchy, chocolatey touch that adds character.
You’ll find the full ingredient list, instructions, and print option in the recipe card below.
How to Make Easy Decorated Halloween Cupcakes Recipe
Step 1: Whip Up the Vanilla Buttercream
Start by beating softened unsalted butter until creamy and fluffy, about 2 minutes with your mixer. Slowly add confectioners’ sugar, heavy cream, and vanilla extract, initially on low speed to avoid sugar clouds, then increase speed for a smooth, airy frosting. Don’t forget a pinch of salt to keep the sweetness balanced. If your frosting is too thin or thick, tweak it gradually by adding more sugar or cream – this step is all about getting that perfect pipeable consistency. When you see some pesky air bubbles, mash the frosting against the bowl sides by hand. It sounds like a lot, but it really makes for a flawless finish!
Step 2: Divide and Tint Your Frosting
Separate the frosting into bowls, depending on how many colors you need. For instance, use leaf green, fuchsia, violet (mix for that pretty purple), orange, and black for your Halloween creatures. A quick tip: if any color looks too bright, add a tiny bit of black gel color to tone it down. Leave one bowl white for your spider webs and body. Stir well until the colors are exactly how you want them. Remember, your frosting colors deepen slightly as they rest, so don’t rush!
Step 3: Decorate the Monster Cupcakes
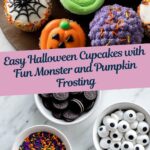
Fit green frosting in a piping bag with a small open star tip to pipe a spiral starting from the outer edge to the center on 6 cupcakes to create monster hair texture. Place a large candy eyeball in the middle, gently pressing so it sticks. For the purple monsters, pipe lots of little stars all over the cupcake, then add multiple small candy eyeballs. Don’t forget sprinkles for some extra monster magic!
Step 4: Create Jack-o’-Lantern Faces
Use orange frosting with a large petal tip to pipe vertical, rounded pumpkin ridges starting from the edge to the center. Then pipe green stems with an open star tip. Use black frosting with a small round tip to draw fun or spooky jack-o’-lantern eyes, noses, and smiling or scary mouths. This is your chance to get playful; every pumpkin can have its own personality!
Step 5: Add Spiders and Webs
Spread white frosting on the cupcakes smoothly using an offset spatula. Pipe three black straight lines intersecting to form six web sections, then connect them with curved lines to complete the web design. Cut Oreo Minis in half and press one half gently onto the web as your spider’s body. Add eyes with tiny dots of black frosting and candy eyeballs, then pipe spider legs on each side with the black frosting tip. These creepy crawlers are cuter than scary and perfect for your party table!
How to Serve Easy Decorated Halloween Cupcakes Recipe
Garnishes
To elevate your cupcakes, sprinkle some edible glitter or use autumn-themed sugar confetti around the cupcakes. Fresh mint leaves or tiny candy pumpkins also add an extra pop when plated. These little touches make your cupcakes look professionally festive and irresistible.
Side Dishes
Complement your cupcakes with a cozy hot chocolate bar or a spiced apple cider station. Both drinks bring warmth and seasonal flavors that pair perfectly with the sweetness and whimsy of your Easy Decorated Halloween Cupcakes Recipe. You could also have bowls of mixed nuts or caramel popcorn to offer contrasting textures.
Creative Ways to Present
Display your cupcakes on tiered cake stands draped in black lace or cobweb tulle for a spooky yet elegant vibe. Arrange them with real mini pumpkins, faux autumn leaves, and battery-operated candles nearby. For a fun touch, place name tags with spooky nicknames for each cupcake design – your guests will love discovering each “monster’s” story!
Make Ahead and Storage
Storing Leftovers
If you have leftover cupcakes after your spooky celebration, store them in an airtight container and refrigerate for up to 5 days. Keep in mind the decorative candy eyes might soften over time, so it’s best to enjoy them fresh whenever possible. Avoid covering them tightly before serving to prevent frosting from sticking to the cover.
Freezing
You can freeze unfrosted cupcakes for up to 3 months by wrapping them individually in plastic wrap and placing them in an airtight container. For decorating convenience and best freshness, frost them after thawing at room temperature. Freezing frosted cupcakes isn’t recommended as it may affect the texture of the buttercream and decorations.
Reheating
Since these cupcakes are served at room temperature or slightly chilled, reheating isn’t necessary. If you prefer them a bit warmer, let refrigerated cupcakes sit out for 30 minutes before serving. Avoid microwaving as it can melt the frosting and ruin your beautiful decorations.
FAQs
Can I use other cupcake flavors for this recipe?
Absolutely! While pumpkin cupcakes are fantastic for fall, chocolate, vanilla, or even spice cakes work beautifully with this decoration style. Just pick your favorite and get creative with frosting colors to match the theme.
What type of food coloring should I use for best results?
Gel food coloring is the best choice because it provides vibrant colors without thinning the frosting, helping you maintain the perfect consistency for detailed piping.
Do I need special piping tips for this Easy Decorated Halloween Cupcakes Recipe?
Yes, having a small open star tip (#21), small round tip (#4), and a large petal tip (#125) will give you the versatility to create all the fun textures and shapes in the monster and jack-o’-lantern designs. But don’t worry, these are easy to find and well worth the investment.
Can I prepare these cupcakes in advance for a party?
You can bake the cupcakes 1 day ahead and store them at room temperature covered. However, the decorations, especially candy eye pupils, look freshest when done the day of serving for that “just made” wow factor.
Any tips for preventing air bubbles in the buttercream?
Yes! After mixing, gently stir the frosting by hand using a spatula pressed against the bowl walls. This “mashes” out trapped air bubbles for a smooth, flawless finish in your piping work.
Final Thoughts
There’s something truly magical about transforming simple cupcakes into adorable Halloween characters with this Easy Decorated Halloween Cupcakes Recipe. It’s such a fun project whether you’re baking with kids, friends, or just treating yourself. Give it a go and watch your festive creations steal the show at your next gathering. Happy decorating and happy Halloween!
PrintEasy Decorated Halloween Cupcakes Recipe
Learn how to create fun and festive Halloween cupcakes with three unique decorated designs: monsters, jack-o’-lanterns, and spiders. This recipe uses your favorite cupcake base—pumpkin cupcakes are featured—and features a rich vanilla buttercream tinted with gel food coloring to transform ordinary cupcakes into a spooky, playful treat perfect for Halloween parties or festive celebrations.
- Prep Time: 45 minutes
- Cook Time: 0 minutes
- Total Time: 45 minutes
- Yield: 12 cupcakes
- Category: Dessert
- Method: No-Cook
- Cuisine: American
Ingredients
Cupcakes
- 12 pumpkin cupcakes or your favorite cupcake recipe
Vanilla Buttercream
- 1 and 1/2 cups (340g) unsalted butter, softened to room temperature
- 6 cups (720g) confectioners’ sugar
- 6 Tablespoons (60ml) heavy cream, half-and-half, or whole milk, at room temperature
- 2 teaspoons pure vanilla extract
- Salt, to taste (about 1/8 teaspoon)
Monster Cupcakes
- Gel food coloring: Leaf Green, Fuchsia + Violet, Super Black
- 2 piping bags
- 2 couplers
- Small open star piping tip (e.g., Wilton #21)
- Small candy eyeballs
- Large candy eyeballs
- Optional: sprinkles
Jack-o’-Lantern Cupcakes
- Gel food coloring: Orange, Leaf Green, Super Black
- 3 piping bags
- Piping tips: Wilton #125 (large petal), Wilton #21 (small open star), small round tip (e.g., Wilton #4)
Spider Cupcakes
- Gel food coloring: Super Black
- 1 piping bag
- Small round piping tip (e.g., Wilton #4)
- Oreo Mini cookies
- Mini candy eyeballs
Instructions
- Make the vanilla buttercream: Using a handheld or stand mixer with a paddle attachment, beat the butter on medium speed for about 2 minutes until creamy. Add 5 and 1/2 cups (660g) of confectioners’ sugar, heavy cream, and vanilla extract. Beat on low speed for 30 seconds; then increase to medium-high speed and beat for 2 minutes. Taste and add about 1/8 teaspoon of salt if too sweet. To remove air bubbles, stir by hand with a silicone spatula or wooden spoon for 1–2 minutes, pressing the frosting against the bowl.
- Adjust consistency: If the frosting is too thin, add up to 1/2 cup (60g) more confectioners’ sugar. If too thick, add heavy cream 1 tablespoon at a time, beating between additions, until the desired consistency is reached.
- Tint the frosting: Divide the buttercream into as many bowls as colors needed (five bowls if making all designs). Tint each with gel food coloring until you reach desired shades. Keep one bowl white for spider cupcakes. To tone down bright colors, add a tiny dot of black gel food coloring and stir well.
- Decorate Green Monster Cupcakes: Fit a piping bag with a small open star tip (Wilton #21) and a coupler if desired. Fill with green frosting. Pipe a spiral from the outside to the center of the cupcake, and press a large candy eyeball in the middle.
- Decorate Purple Monster Cupcakes: Use a piping bag with a small open star tip (Wilton #21). Fill with purple frosting. Pipe stars all over the cupcake surface. Press small candy eyeballs into the frosting and finish with sprinkles, if desired.
- Decorate Jack-o’-Lantern Cupcakes: Fit three piping bags with different tips: large petal tip (#125) for orange frosting, small open star tip (#21) for green frosting, and small round tip (#4) for black frosting. Pipe rounded vertical pumpkin sections in orange, alternating sides, then pipe a green stem on top. Use black frosting to create eyes, nose, and a mouth, shaping it spooky or goofy.
- Decorate Spider Cupcakes: Spread white frosting evenly over the cupcake with a small offset spatula or knife. Using black frosting in a piping bag with a small round tip (#4), pipe three straight, criss-crossing lines across the top to form six triangular sections. Connect these with slightly curved lines to create a web. Place half of a mini Oreo cookie on the web to form the spider body. Pipe two small black dots for eyes, then place two mini candy eyeballs on those dots. Finish by piping eight black legs—four on each side of the Oreo.
- Storage: Store decorated cupcakes uncovered at room temperature for a few hours before serving. For leftovers, cover and refrigerate for up to 5 days. Use a cupcake carrier for transportation and storage.
Notes
- These cupcakes are best served the same day they are decorated as the candy eyeballs’ pupils may become runny over time.
- If decorating the night before, store cupcakes uncovered to prevent moisture buildup.
- Cupcakes can be baked a day in advance and stored covered at room temperature; decorate on the day of serving for best results.
- For smooth confectioners’ sugar, sift 1-2 times before measuring.
- Use heavy cream for the creamiest frosting; half-and-half or whole milk works but yields less creamy results. Ensure liquids are at room temperature to avoid separation or graininess.
- Recommended tools include an electric mixer (handheld or stand), silicone spatula or wooden spoon, piping bags and tips, and a cupcake carrier.



https://shorturl.fm/RitT9