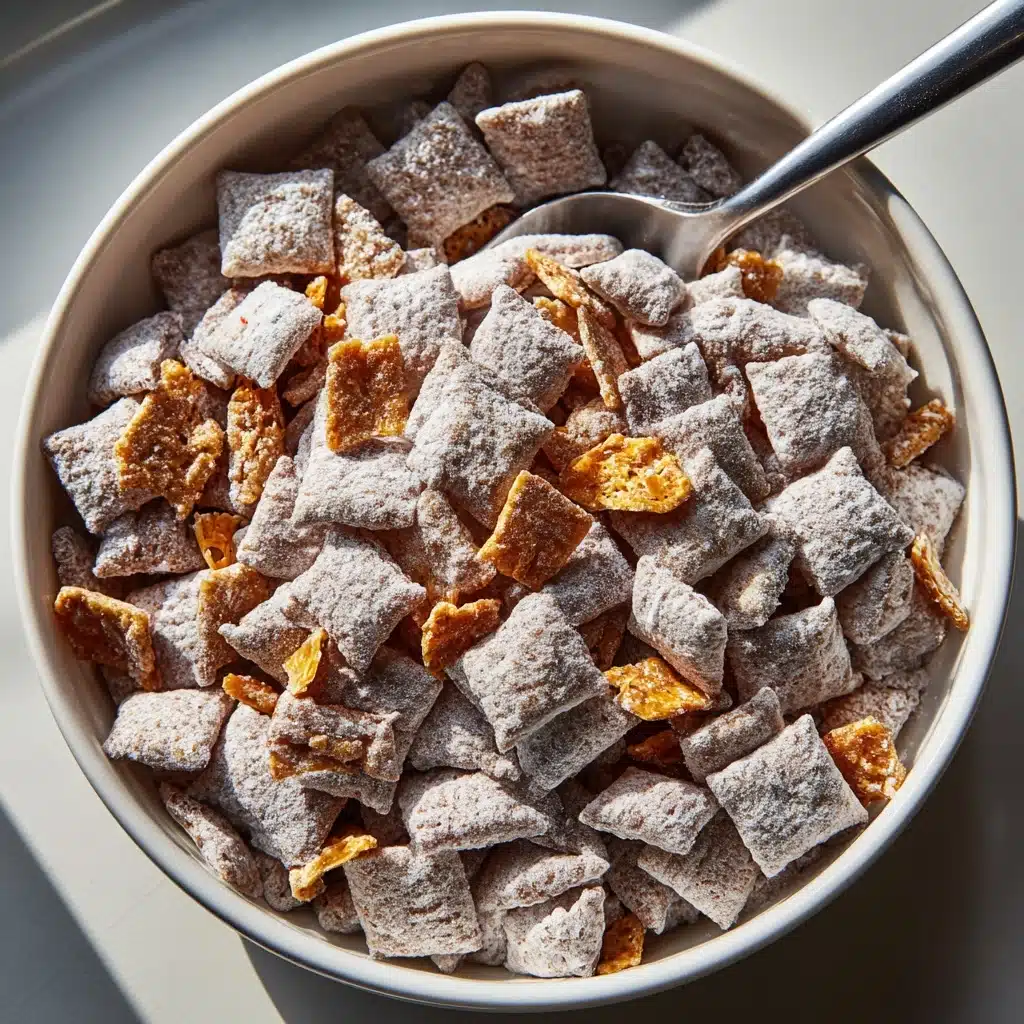
If you’re on the hunt for a dessert that’s truly irresistible and unbelievably easy, look no further than Butterfinger Puppy Chow. This treat is crunchy, chocolatey, and peanut buttery, all at once—and packed with everyone’s favorite: that unmistakable Butterfinger candy bar crunch! Whether you’re whipping up a quick snack for movie night, prepping a sweet party tray, or just want a fun baking project with the kids, this Butterfinger Puppy Chow comes together in minutes and disappears even faster.
Ingredients You’ll Need
The beauty of Butterfinger Puppy Chow is how a handful of pantry staples transforms into something extraordinary. Each ingredient lends its own flavor and texture, from that satisfying cereal crunch to the gooey, melty chocolate coating, to those magical bursts of Butterfinger candy.
- Rice Chex Cereal (7 cups): The perfect blank canvas that holds up to all the mix-ins without getting soggy. You can swap in a store brand or even mix with corn or wheat Chex for extra texture!
- Semi Sweet Chocolate Chips (1 cup): Melted chocolate brings deep, luscious flavor; try milk or dark chocolate chips if you like to mix it up.
- Creamy Peanut Butter (½ cup): Makes the coating smooth, rich, and adds that classic flavor everyone loves in Puppy Chow.
- Salted Butter (¼ cup): Adds a touch of richness and helps everything meld together; salted is best for balancing sweetness.
- Pure Vanilla Extract (1 teaspoon): A must for that warm, bakery-fresh aroma and depth of flavor.
- Fun Size Butterfinger Candy Bars (18 total): Fifteen crushed up for candy-flecked throughout, plus three more roughly chopped for eye-catching garnishes at the end.
- Powdered Sugar (1 ¼ cups, sifted): Flawless sweetness, and the final touch that makes this snack impossibly snackable (and a little messy—in the most fun way)!
How to Make Butterfinger Puppy Chow
Step 1: Prep the Cereal Base
Pour all the Rice Chex cereal into an extra large bowl. You’ll want plenty of room to toss everything together later, and a big bowl will keep things from spilling all over your counter. Trust me, it gets a little wild in a good way once the chocolate hits the cereal!
Step 2: Melt Chocolate, Peanut Butter, and Butter Together
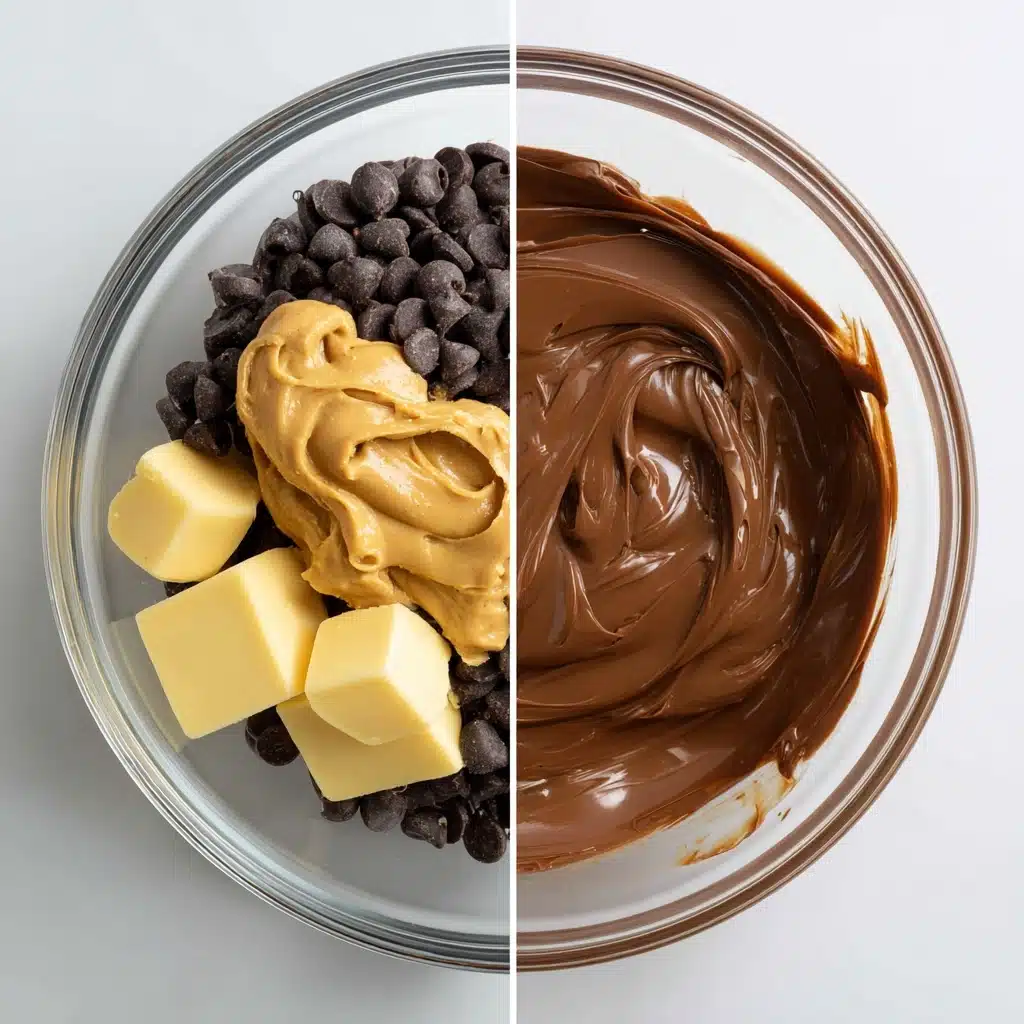
In a separate microwave-safe bowl, combine the semi sweet chocolate chips, creamy peanut butter, and salted butter. Pop it in the microwave on high for 1 minute. When done, stir well until the mixture is silky-smooth and fully melted. If you see any stubborn lumps, microwave in 10-second intervals, stirring between each, until everything is perfectly glossy.
Step 3: Add Vanilla for Flavor Magic
Once your chocolate and peanut butter mixture is smoother than velvet, stir in that pure vanilla extract. It gives such a delicious aroma and really ties together all the flavors—don’t skip this!
Step 4: Coat the Cereal with Chocolate Mixture
Drizzle that warm, decadent chocolate-peanut butter blend over your bowl of cereal. Now comes the fun part: gently stir until every piece is coated in shiny, chocolatey goodness. Take care not to crush the cereal—you want those squares to keep their crunch.
Step 5: Add Crushed Butterfinger Bars
Grab your 15 fun-size Butterfinger bars and crush them up (a zip-top bag and a rolling pin or mallet work wonders here). Gently fold the crushed candy into the coated cereal. The result: every handful has plenty of Butterfinger pieces, giving the Butterfinger Puppy Chow tons of that signature flavor.
Step 6: Coat in Powdered Sugar
For this step, you can either toss the coated cereal with the powdered sugar right in the bowl and stir, or—my favorite method—transfer it all to a huge (2 gallon) zip-top bag, dump in the powdered sugar, and shake until every piece is winter-white. This method keeps cleanup easy and is very satisfying!
Step 7: Dry and Garnish
Spread the coated Butterfinger Puppy Chow out on a baking sheet to dry for a few minutes. Just before serving, sprinkle on the three remaining fun-size Butterfinger bars (roughly chopped) for an extra burst of color, crunch, and candy bliss.
How to Serve Butterfinger Puppy Chow
Garnishes
Dress up your Butterfinger Puppy Chow with extra chopped Butterfinger pieces on top, a smattering of mini Reese’s pieces, or a dusting of even more powdered sugar. Not only does it add extra texture and color, but it also makes each bite feel special and decadent.
Side Dishes
While this treat is a star on its own, try serving it alongside a platter of fresh fruit (think strawberries and grapes) for a bit of balance. Pairing with salty snacks like pretzels or popcorn makes for an addictive sweet-salty combo that’s always a hit at gatherings.
Creative Ways to Present
Spoon the Butterfinger Puppy Chow into festive bowls for parties, or package it up in cute cellophane bags or mason jars tied with ribbon for gifts. You can even layer it in parfait glasses with whipped cream for a whimsical dessert. The possibilities are as fun as they are delicious!
Make Ahead and Storage
Storing Leftovers
Keep your Butterfinger Puppy Chow fresh by storing it in an airtight container at room temperature for up to a week. Just be sure it’s fully cooled and dry before packing it up so it stays perfectly crunchy. It’s a fantastic make-ahead treat for parties or movie nights, and it keeps its flavor beautifully.
Freezing
Yes, you can freeze Butterfinger Puppy Chow! Seal it tight in a freezer-safe bag or container, and it’ll keep for up to 2 months. Let it thaw at room temperature for about 15 minutes before serving. The texture stays just as crunchy, making it a great option for prepping in advance.
Reheating
No reheating required—Butterfinger Puppy Chow is best enjoyed at room temperature. If you’ve frozen it, a brief rest on the counter is all you need for it to taste like it was just made.
FAQs
Can I use a different cereal instead of Rice Chex?
Absolutely! Corn Chex or wheat Chex work just as well, and even a mix of the three adds a fun variety in flavor and crunch. Avoid cereals that are too sweet, since the Butterfinger and chocolate provide plenty of sweetness.
Can I make Butterfinger Puppy Chow in advance?
Yes, you can whip this up a day or two ahead and store it in an airtight container. In fact, the flavors mingle and deepen over time, making each bite more delicious!
Is it possible to make this treat gluten-free?
Just use certified gluten-free Rice Chex and double-check your Butterfinger bars for any gluten-containing ingredients, and you’re set for a totally gluten-free treat.
What fun mix-ins can I add?
Butterfinger Puppy Chow is endlessly customizable! Try folding in mini peanut butter cups, Reese’s pieces, or even chocolate-covered pretzels for even more fun flavors and textures.
How do I keep the powdered sugar coating from getting clumpy?
Make sure your cereal mixture has cooled a bit before adding the powdered sugar and always sift your sugar for the finest, most even coating. Using a large zip-top bag to shake everything together also ensures excellent coverage with minimal clumps.
Final Thoughts
Trust me—if you’ve never made Butterfinger Puppy Chow before, you are in for a total treat! With its layers of chocolate, peanut butter, and crunchy Butterfinger goodness, it’s guaranteed to steal the spotlight at any get-together. Gather your ingredients, invite your favorite people (or just treat yourself!), and savor every sweet, crispy bite of this crowd-pleasing snack.
PrintButterfinger Puppy Chow Recipe
This Butterfinger Puppy Chow is a delightful and easy no-bake treat that combines the irresistible flavors of chocolate, peanut butter, and Butterfinger candy bars. Crunchy, sweet, and utterly addictive, it’s a perfect snack for any occasion.
- Prep Time: 10 minutes
- Cook Time: 1 minute
- Total Time: 11 minutes
- Yield: 14 servings
- Category: Dessert
- Method: No-Bake
- Cuisine: American
- Diet: Vegetarian
Ingredients
Rice Chex Cereal Mix:
- 7 cups Rice Chex Cereal, or store brand version
Chocolate Peanut Butter Coating:
- 1 cup semi-sweet chocolate chips
- ½ cup creamy peanut butter
- ¼ cup salted butter
- 1 teaspoon pure vanilla extract
Additional:
- 18 fun size Butterfinger candy bars, 15 crushed and 3 roughly chopped for garnish
- 1 ¼ cup powdered sugar, sifted
Instructions
- Add the Cereal: Place the cereal in an extra-large bowl.
- Prepare Chocolate Peanut Butter Coating: In a microwave-safe bowl, melt the chocolate chips, peanut butter, and butter for 1 minute. Stir until smooth. Add vanilla extract and mix well.
- Coat the Cereal: Pour the chocolate peanut butter mixture over the cereal and gently stir to coat. Mix in the crushed Butterfinger candy bars.
- Add Powdered Sugar: Sprinkle powdered sugar over the coated cereal and stir, or transfer the mixture to a large ziplock bag and shake to coat evenly.
- Final Touches: Spread the coated cereal on a baking sheet to dry. Before serving, top with the chopped Butterfinger candy bars.
Notes
- Milk chocolate chips, dark chocolate chips, or candy melts can be used as alternatives.
- Experiment with different Chex cereal varieties for varied textures.
- Customize with additional mix-ins like mini peanut butter cups, Reese’s Pieces, or Butterfinger balls.
Nutrition
- Serving Size: 1 serving
- Calories: 358 kcal
- Sugar: 28g
- Sodium: 230mg
- Fat: 18g
- Saturated Fat: 8g
- Unsaturated Fat: 8g
- Trans Fat: 0.2g
- Carbohydrates: 48g
- Fiber: 2g
- Protein: 5g
- Cholesterol: 9mg

