If you’ve never made a Delicious Japanese Cheesecake before, you’re in for a real treat! Imagine the dreamy lightness of soufflé meeting the creaminess of a classic cheesecake, topped with a golden brown, slightly pillowy crust. This internationally adored cake is the definition of melt-in-your-mouth magic, with tangy citrus notes, vanilla perfume, and the sort of texture you want to tell all your friends about. Whether you’ve tried one at a bakery or you’re totally new to the style, this step-by-step recipe will help you conquer the Delicious Japanese Cheesecake and become the hero of your next gathering.
Ingredients You’ll Need
Though the ingredients list may look humble, each item plays an essential role in the final flavor, cloud-like texture, and signature wobble of this dessert. Be sure to use the best quality you can, and don’t skip the tips for bakery-worthy results!
- Eggs: Use large, fresh eggs; they provide the lift and structure that gives Delicious Japanese Cheesecake its signature airy texture.
- Unsalted Butter: Just a bit adds richness without overwhelming the delicate flavor.
- Full-Fat Cream Cheese: Go for regular, block-style cream cheese for a perfectly creamy base.
- Heavy Cream: Brings a luxurious richness and velvety crumb.
- Sour Cream: Adds a gentle tang and keeps the cake ultra-moist.
- Granulated Sugar: Sweetens and balances the tang, while giving structure to the batter and meringue.
- Kosher Salt: Just a pinch sharpens every flavor and balances the sweetness.
- Lemon Juice: Fresh lemon juice brightens up the whole cake with a subtle, perky note.
- Vanilla Extract: For an inviting aroma that tastes like comfort in every bite.
- Cake Flour: Choose cake flour for a feather-light crumb—don’t substitute with all-purpose here!
- Powdered Sugar (optional): Dust on top for a touch of sweetness and a classic bakery look.
- Berries (optional): Fresh strawberries, blueberries, or raspberries add a lovely pop of color and acidity.
How to Make Delicious Japanese Cheesecake
Step 1: Prepare Your Pan and Tools
Getting your cake pan ready is the unsung hero of perfect results! Butter your 8×3-inch round cake pan generously, then line it with parchment strips to create a sling and an extra-tall collar. This helps the cheesecake rise tall and unmold easily, preventing heartbreak later. Have your roasting pan and a kettle of hot water ready, too—you’ll need these for the signature water bath that bakes the cheesecake ever-so-gently.
Step 2: Separate the Eggs
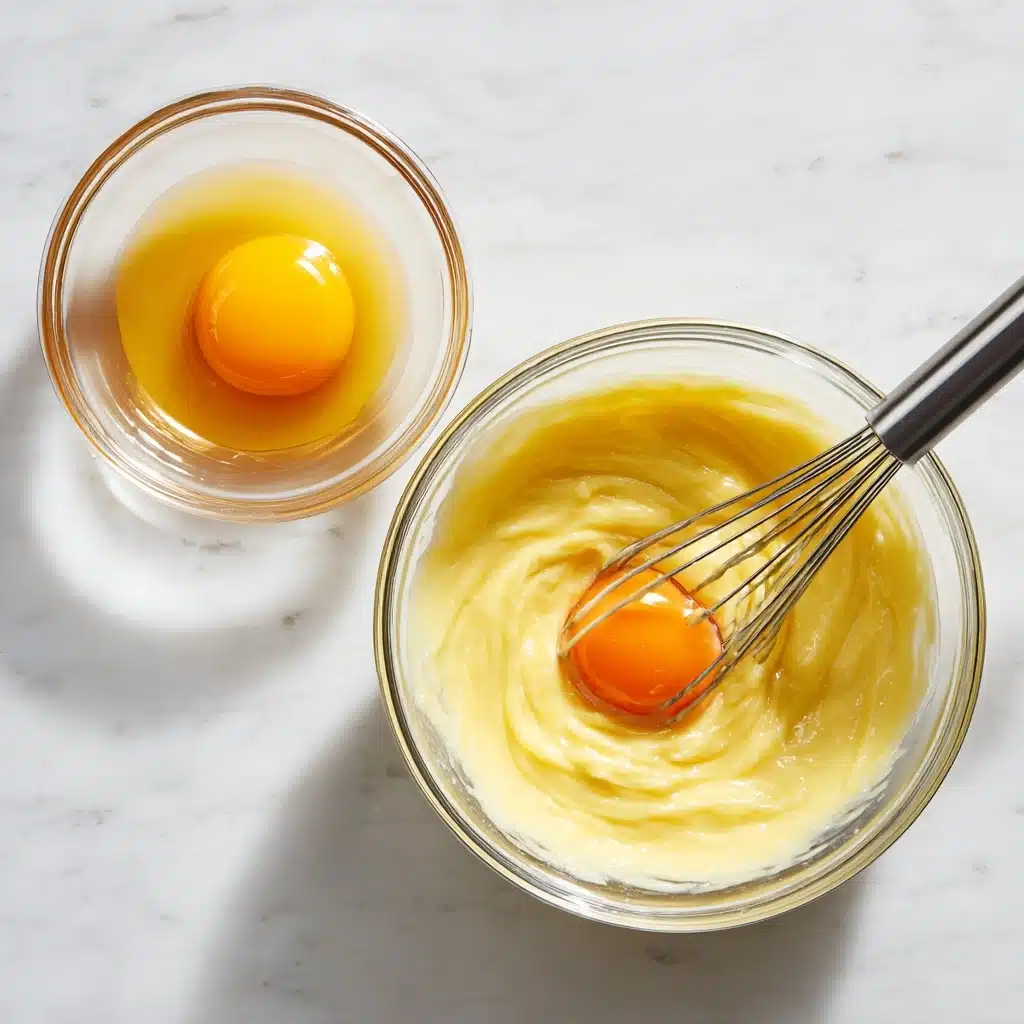
While your oven preheats to 325°F, separate the eggs, placing whites in your stand mixer bowl and yolks in a small bowl. This is a little detail that makes a big difference; keeping the whites free from any yolk helps your meringue whip up gorgeously glossy and full of volume. Don’t forget to set your water on to boil for the later step!
Step 3: Make the Cream Cheese Mixture
Create a double boiler by setting a large, heat-safe bowl over a pot with one inch of simmering water. Place the butter, cream cheese, heavy cream, sour cream, a half cup of sugar, and salt in the bowl and gently whisk until smooth and luscious. This gentle heating ensures everything melts evenly and combines to yield that velvety mouthfeel we adore in Delicious Japanese Cheesecake. Once it’s smooth, take it off the heat and let it cool for a moment.
Step 4: Build Flavor and Incorporate Yolks
Now, whisk in the lemon juice and vanilla, savoring that burst of aroma. Next, add the egg yolks one at a time, whisking until each is fully incorporated. Sprinkle your cake flour over the top and whisk gently—this isn’t the time to build gluten! Stop as soon as the batter is smooth and unified.
Step 5: Make the Meringue
Using a stand mixer with a whisk attachment, beat the egg whites on medium until they look opaque and foamy. Gradually add the remaining 1/3 cup sugar, one spoonful at a time. Continue beating on medium speed until firm peaks form: they should be upright but with a soft curl at the tip. Be careful not to overbeat—your meringue should be silky, not crumbly. This meringue is the secret to the dreamy, soufflé-style lift of your Delicious Japanese Cheesecake.
Step 6: Fold and Combine
Time for a gentle hand! Use your whisk to delicately fold one-third of the meringue into the cream cheese mixture, just until no streaks remain. Carefully fold in the remaining meringue in two batches, using sweeping, circular motions to keep as much air as possible. Your goal: a super-light, fluffy batter that you can pour right into your prepared cake pan.
Step 7: Bake in a Water Bath
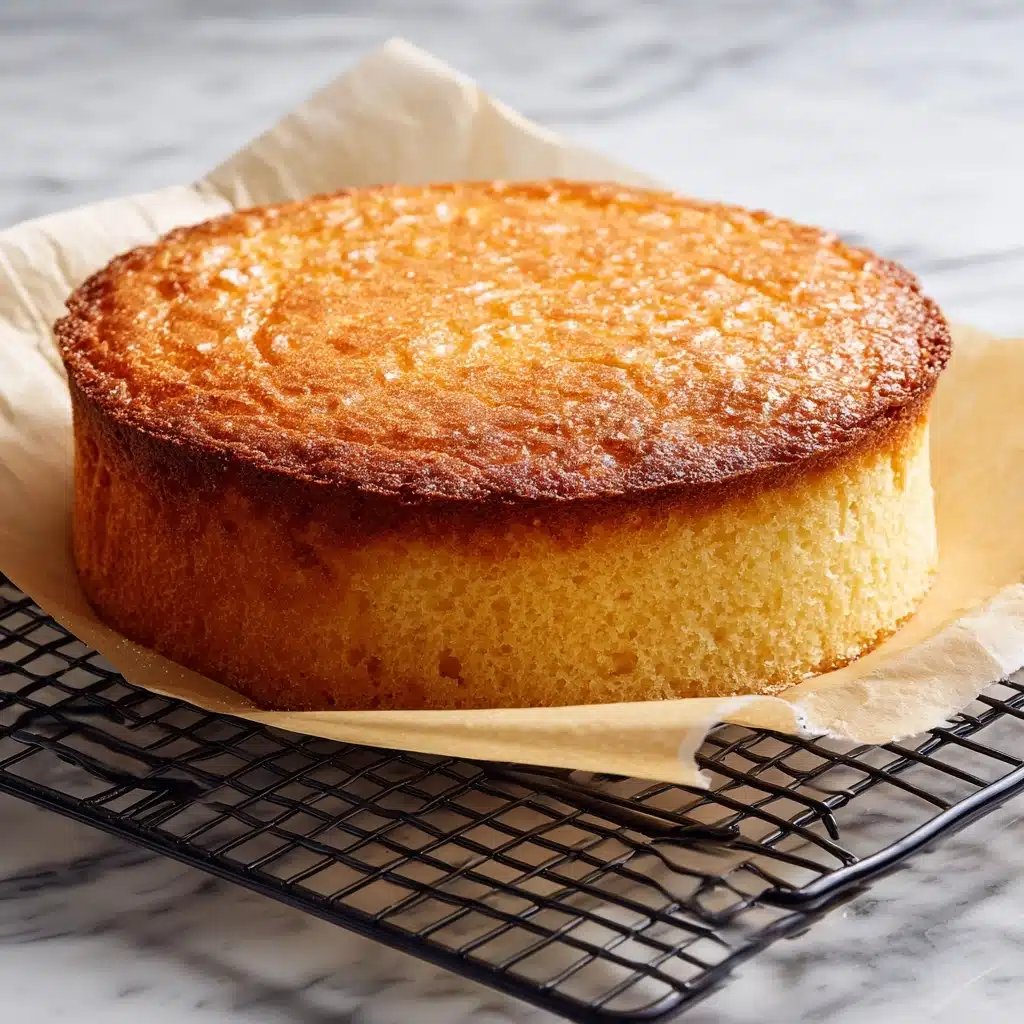
Set your cake pan inside a larger roasting pan on the oven rack. Pour hot water into the roasting pan so it climbs halfway up the side of your cake pan—careful not to splash on your batter! This water bath, or bain-marie, coaxes the cheesecake into creamy, gentle perfection without cracking or drying out. Bake for about 1 hour until the top is gorgeously golden and set. Let the cheesecake rest in the switched-off oven, then crack the oven door and let it sit a bit longer. This gradual cooling helps prevent cracks and ensures the texture stays meltaway soft.
Step 8: Cool and Remove from Pan
Transfer the roasting pan to a cooling rack and gently lift your cheesecake out of the water bath. Let it cool completely in the pan, then use the parchment sling to lift it out. Peel away the paper, marvel at your perfect creation, and decide: serve at room temperature or give it a chill in the fridge for slices so neat you could set them on parade. Finish with a dusting of powdered sugar and maybe a scatter of fresh berries.
How to Serve Delicious Japanese Cheesecake
Garnishes
For a classic look, a gentle snowfall of powdered sugar over the top is both elegant and inviting. Fresh berries—think strawberries, blueberries, or raspberries—look stunning and add a vibrant pop of flavor that plays beautifully against the creamy tang. If you love a little extra tang, add some lemon zest or a dollop of softly whipped cream for a truly swoon-worthy finish.
Side Dishes
Pair your Delicious Japanese Cheesecake with a simple fruit salad, a couple of crisp biscotti, or even a scoop of matcha ice cream for a nod to its Japanese roots. For a tea-themed afternoon, serve alongside delicate green tea or floral jasmine tea—each sip and bite will elevate the other!
Creative Ways to Present
For your next special occasion, try slicing the cheesecake into dainty rectangles and plating as part of an elegant dessert trio. Or, cut out individual rounds using a ring mold and top each with a trio of berries or edible flowers for a stunning mini treat. If you’re serving family style, scatter mixed fresh fruits on top, then present the whole cheesecake right at the table for a dramatic reveal everyone will remember.
Make Ahead and Storage
Storing Leftovers
Delicious Japanese Cheesecake does wonderfully stored in the refrigerator. Cover tightly with plastic wrap or keep it in an airtight container. It will stay fresh and creamy for up to a week—meaning you can sneak a slice every night without worry!
Freezing
If you’d like to save some for longer, wrap individual slices or the whole (cooled) cheesecake in plastic wrap, then foil, and freeze for up to a month. To serve, just move it to the fridge and thaw overnight. The texture remains beautifully soft, making it a dessert you can truly make ahead for any occasion.
Reheating
No need to reheat Delicious Japanese Cheesecake—it’s typically served cold or at room temperature, maintaining its velvety-light crumb. If you prefer a slightly warmer bite, let a slice sit on the counter for 30 minutes before serving, but avoid using the microwave as it can change the texture.
FAQs
Can I use all-purpose flour instead of cake flour?
For the signature airy texture, cake flour is the best choice—it’s lighter and softer than all-purpose, which helps keep Delicious Japanese Cheesecake fluffy instead of dense. If you must substitute, try removing 1 tablespoon of flour from each 1/2 cup of all-purpose and replacing it with cornstarch, then sifting well.
What’s the best way to prevent cracks in my cheesecake?
The key is gradual cooling and gentle heat! Always use the water bath, avoid overmixing, and let the cake cool in the oven with the door cracked. Don’t skip the parchment collar, which helps the cake rise evenly and reduces stress as it cools.
Can I make this gluten-free?
Absolutely! Swap the cake flour for a cup-for-cup gluten-free baking blend. Make sure it’s designed for cakes, and sift before using for the best results. The texture will stay beautifully soft and lofty.
Do I need a stand mixer for the meringue?
While a stand mixer makes whipping egg whites fast and easy, you can use a hand mixer or even whip by hand if you’re feeling extra energetic. The important thing is to beat the whites to firm (not stiff or dry) peaks for the fluffiest cheesecake.
How do I know when Delicious Japanese Cheesecake is done?
The top will be glossy and golden brown, and the center should wobble just slightly when you gently shake the pan. If you’re ever unsure, insert a toothpick into the edge—it should come out clean but may be slightly moist from the center.
Final Thoughts
If you’re looking to impress, Delicious Japanese Cheesecake is the answer every time! This recipe is a joy to make and an even bigger joy to share. Once you take that first bite, you’ll want to make it again and again. Gather your ingredients, invite a friend to help, and experience the bliss of homemade Delicious Japanese Cheesecake—you’ll be glad you did!
PrintDelicious Japanese Cheesecake Recipe
Indulge in the light and fluffy goodness of this Delicious Japanese Cheesecake recipe. With a perfect balance of sweetness and tanginess, this dessert is sure to impress your family and friends.
- Prep Time: 40 mins
- Cook Time: 70 mins
- Total Time: 3 hrs 20 mins
- Yield: 1 (8-inch) cheesecake
- Category: Desserts
- Method: Baking
- Cuisine: Japanese
- Diet: Vegetarian
Ingredients
Eggs:
- 4 large eggs
Butter:
- 4 tablespoons unsalted butter, plus more for greasing the pan
Cream Cheese Mixture:
- 1 (8-ounce) block full-fat cream cheese
- 1/4 cup heavy cream
- 1/4 cup sour cream
- 1/2 cup plus 1/3 cup granulated sugar, divided
- 1/4 teaspoon kosher salt
- 1 1/2 tablespoons lemon juice (from about 1/2 of a lemon)
- 2 teaspoons vanilla extract
- 1/2 cup (60g) cake flour
Optional Garnishes:
- Powdered sugar, for dusting
- Berries, for garnish
Instructions
- Prepare the Pan: Preheat the oven and grease the cake pan.
- Separate the Eggs: Place egg whites in a stand mixer.
- Combine Dairy and Sugar: Melt butter, cream cheese, heavy cream, sour cream, sugar, and salt together.
- Finish the Cream Cheese Base: Whisk in lemon juice, vanilla extract, egg yolks, and cake flour.
- Make the Meringue: Beat egg whites and sugar until firm peaks form.
- Fold in the Egg Whites: Gently fold meringue into the cream cheese mixture.
- Bake the Cheesecake: Place in a water bath and bake until set.
- Cool and Serve: Remove from oven, cool, and serve with optional garnishes.
Notes
- For best results, ensure all ingredients are at room temperature before starting.
- Be gentle when folding in the meringue to keep the cheesecake light and airy.
Nutrition
- Serving Size: 1 slice
- Calories: 224
- Sugar: 19g
- Sodium: 180mg
- Fat: 15g
- Saturated Fat: 8g
- Unsaturated Fat: 6g
- Trans Fat: 0g
- Carbohydrates: 19g
- Fiber: 0g
- Protein: 4g
- Cholesterol: 108mg




https://shorturl.fm/U8y5B
https://shorturl.fm/OqDvE